
Homemade Hardware - Week 3
Marquee board design in Eagle
Our class picked this emoji as the choice for our midterm marquee project:
ε-(´・`)ノ”
I've been tasked with making a board for the right hand parenthesis. I'm frankly not sure how to best position it. The reproduction of this emoji on the marquee is going to depend a lot on the relative spacing of everyone's individual PCBs/characters. For now, I've opted with setting my ")" toward the right side of my board design.

Assuming we get a chance to revise our designs before manufacture, I think I'd like to add a feature separate from the capacitive touch control for the parenthesis, if possible. For now, it's basically just ten LEDs in a curve. If it'd be possible to have this be an emoji-within-an-emoji, with additional LEDs that can be toggled on/off to make a simple smiley face, I'd like to make that happen. :)
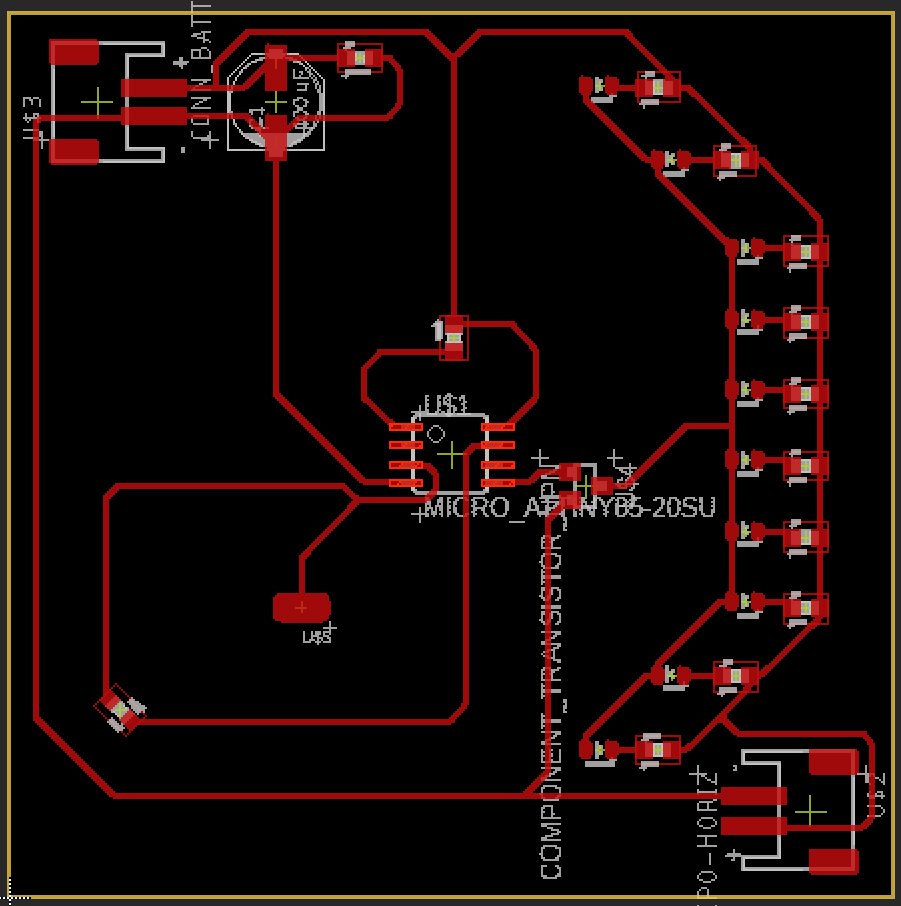
Eagle's quite the finnicky program, I'm learning. The alignment feature was vital in lining up the LEDs and resistors for the straight part of the parenthesis. I was working mostly at a scale of 0.25mm, and it felt like I'd place two parts in a straight line only to find them offset by some amount later on. I'd also like to be more precise (read: more aesthetically pleasing) with my traces, and at the moment I don't know enough about the drawing/mitering options to know how I'd get there beyond just dropping the grid size down even smaller and tweaking from there.
–2/12/23