
Intro to Fabrication - Week 1
Blogging about a box
First week of fab! This basically marks my second time working inside a wood shop. Last year I took a one night class at Makeville in Brooklyn from my friend/accomplished woodworker Jenna Goodman. That night I used a miter saw, bandsaw, drill press, orbital sander, router, and some stain to make a nice looking serving board.
Haven't worked with wood since, so this first assignment was a good refresher.
The box - initial sketch
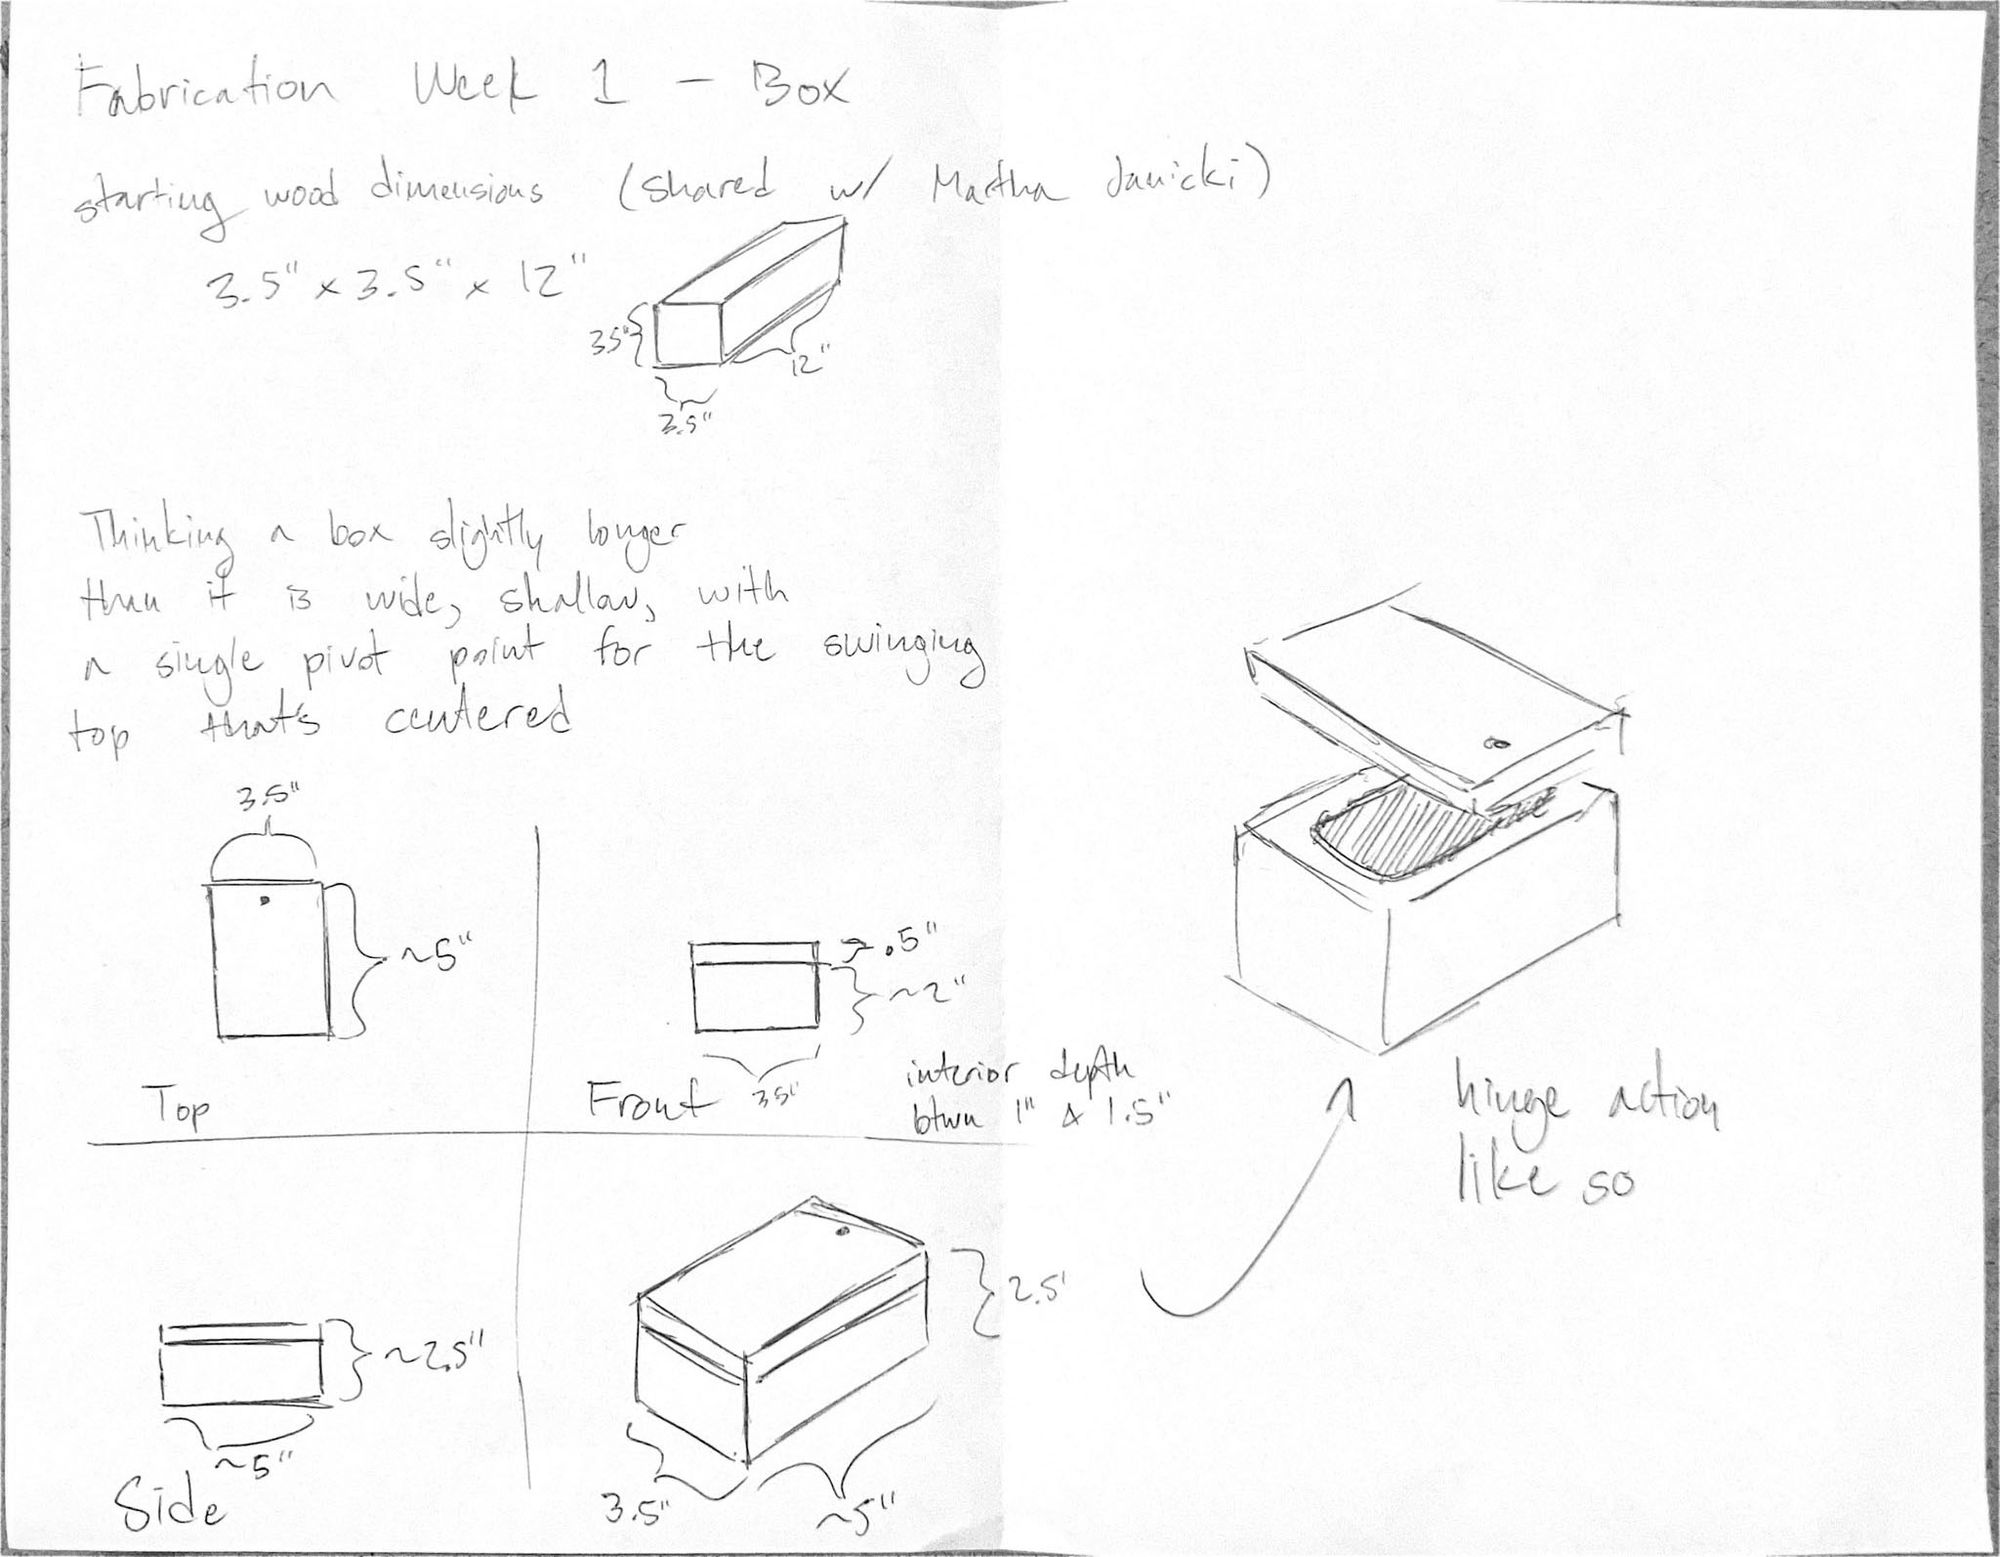
Martha Janicki and I went to Bruno's Hardware to pick up wood for the project. We both took about 5" from the 1-foot piece, hopefully another student made a tiny box from the scrap remainder.
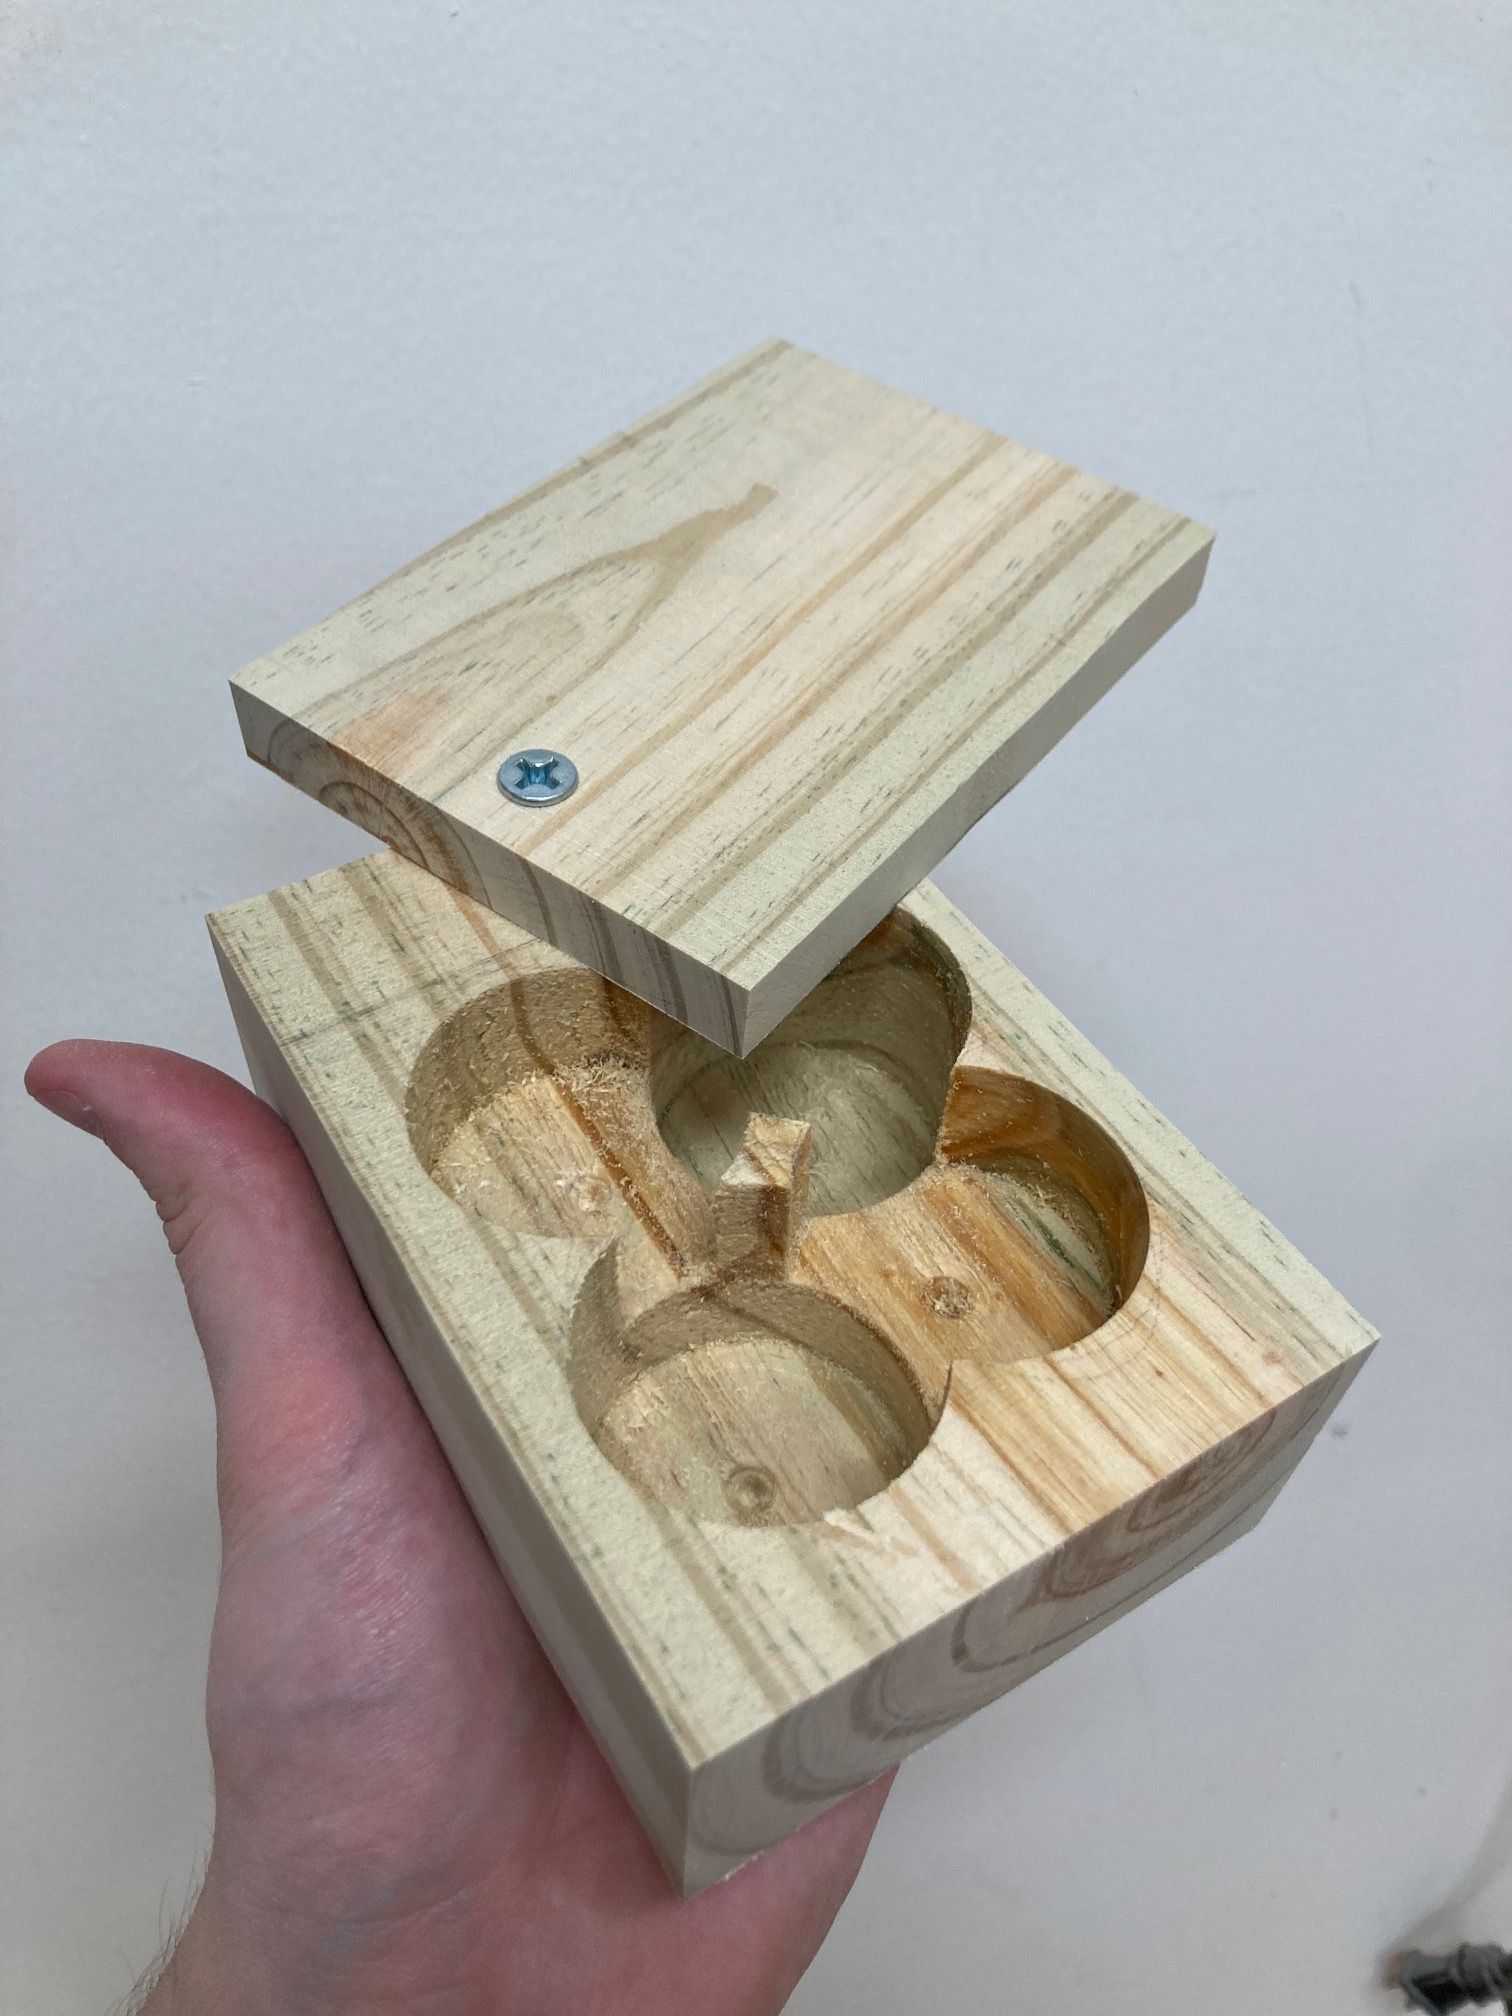
I had an idea of how I wanted to make the compartment with the drill press and forstner bits, not depicted above. Otherwise, the only major feature here is deciding to place the pivot point/screw for the box lid along the center line of the box, long ways.
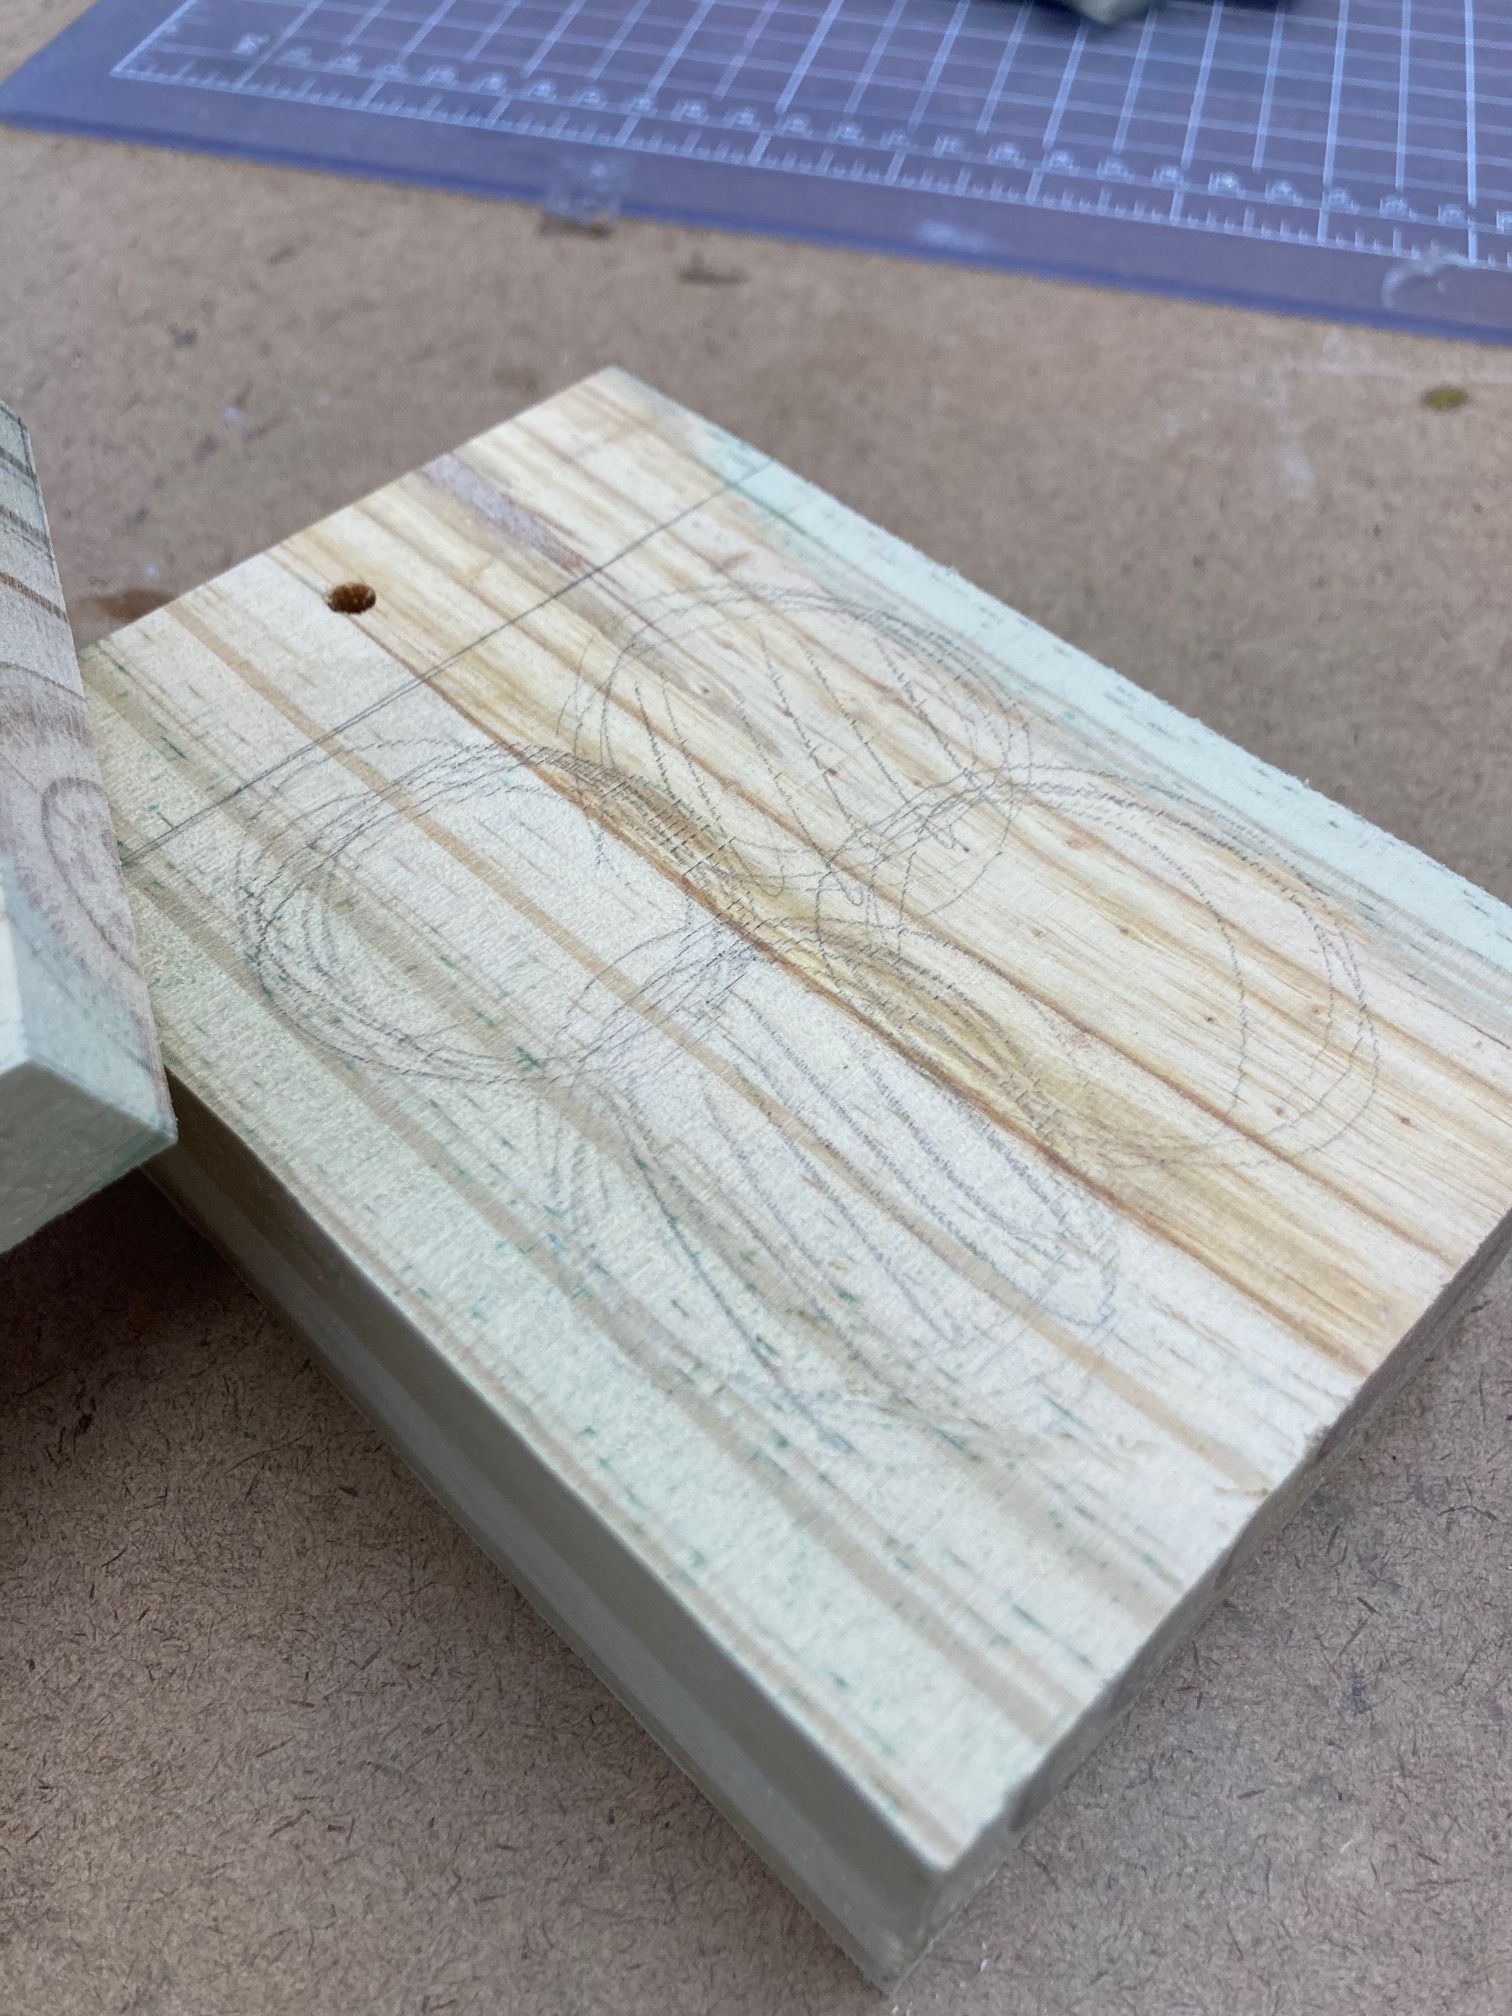
The plan for the compartment was to embrace the shape of the drill bit rather than try to make a more rectangular shape–four depressions of the bit, two on a shared shallow plane and two deeper, creating a single compartment with two levels and a divider. I eyeballed the depth with the drill press, just making sure to bring it down to the same point on the measuring lines on the machine for the two levels.
The step-by-step
- (Friday) Split wood with Martha using bandsaw
- First sanding pass to level out sides/remove markings
- Drill hole for screw
- Slice off excess and lid using bandsaw
- Sink two shallower holes using forstner bit
- Sink two deeper holes (went back and made first deeper, required realigning)
- Screw lid to box
- (Monday) Use dremel with sanding bit to smooth sides of compartment
- Use dremel cutting bit to slice off center post on interior
- Use chisel and 220-grit sandpaper to file off remainder of bit (suggestions from Sam de Armas and Josh Zhong)
- Use sandpaper to lightly finish edges of box, leaving the top jagged texture from bandsaw intentionally

Room for improvement: as built, the screw threads through the lid and the body of the box, which means twisting the top is essentially unthreading the screw. I discussed a few ways to fix this with Phil, but decided to spend my additional time on Monday to focus on removing the post sticking up in the middle of the box. Let the screw be a reminder to plan that stuff more in the future!
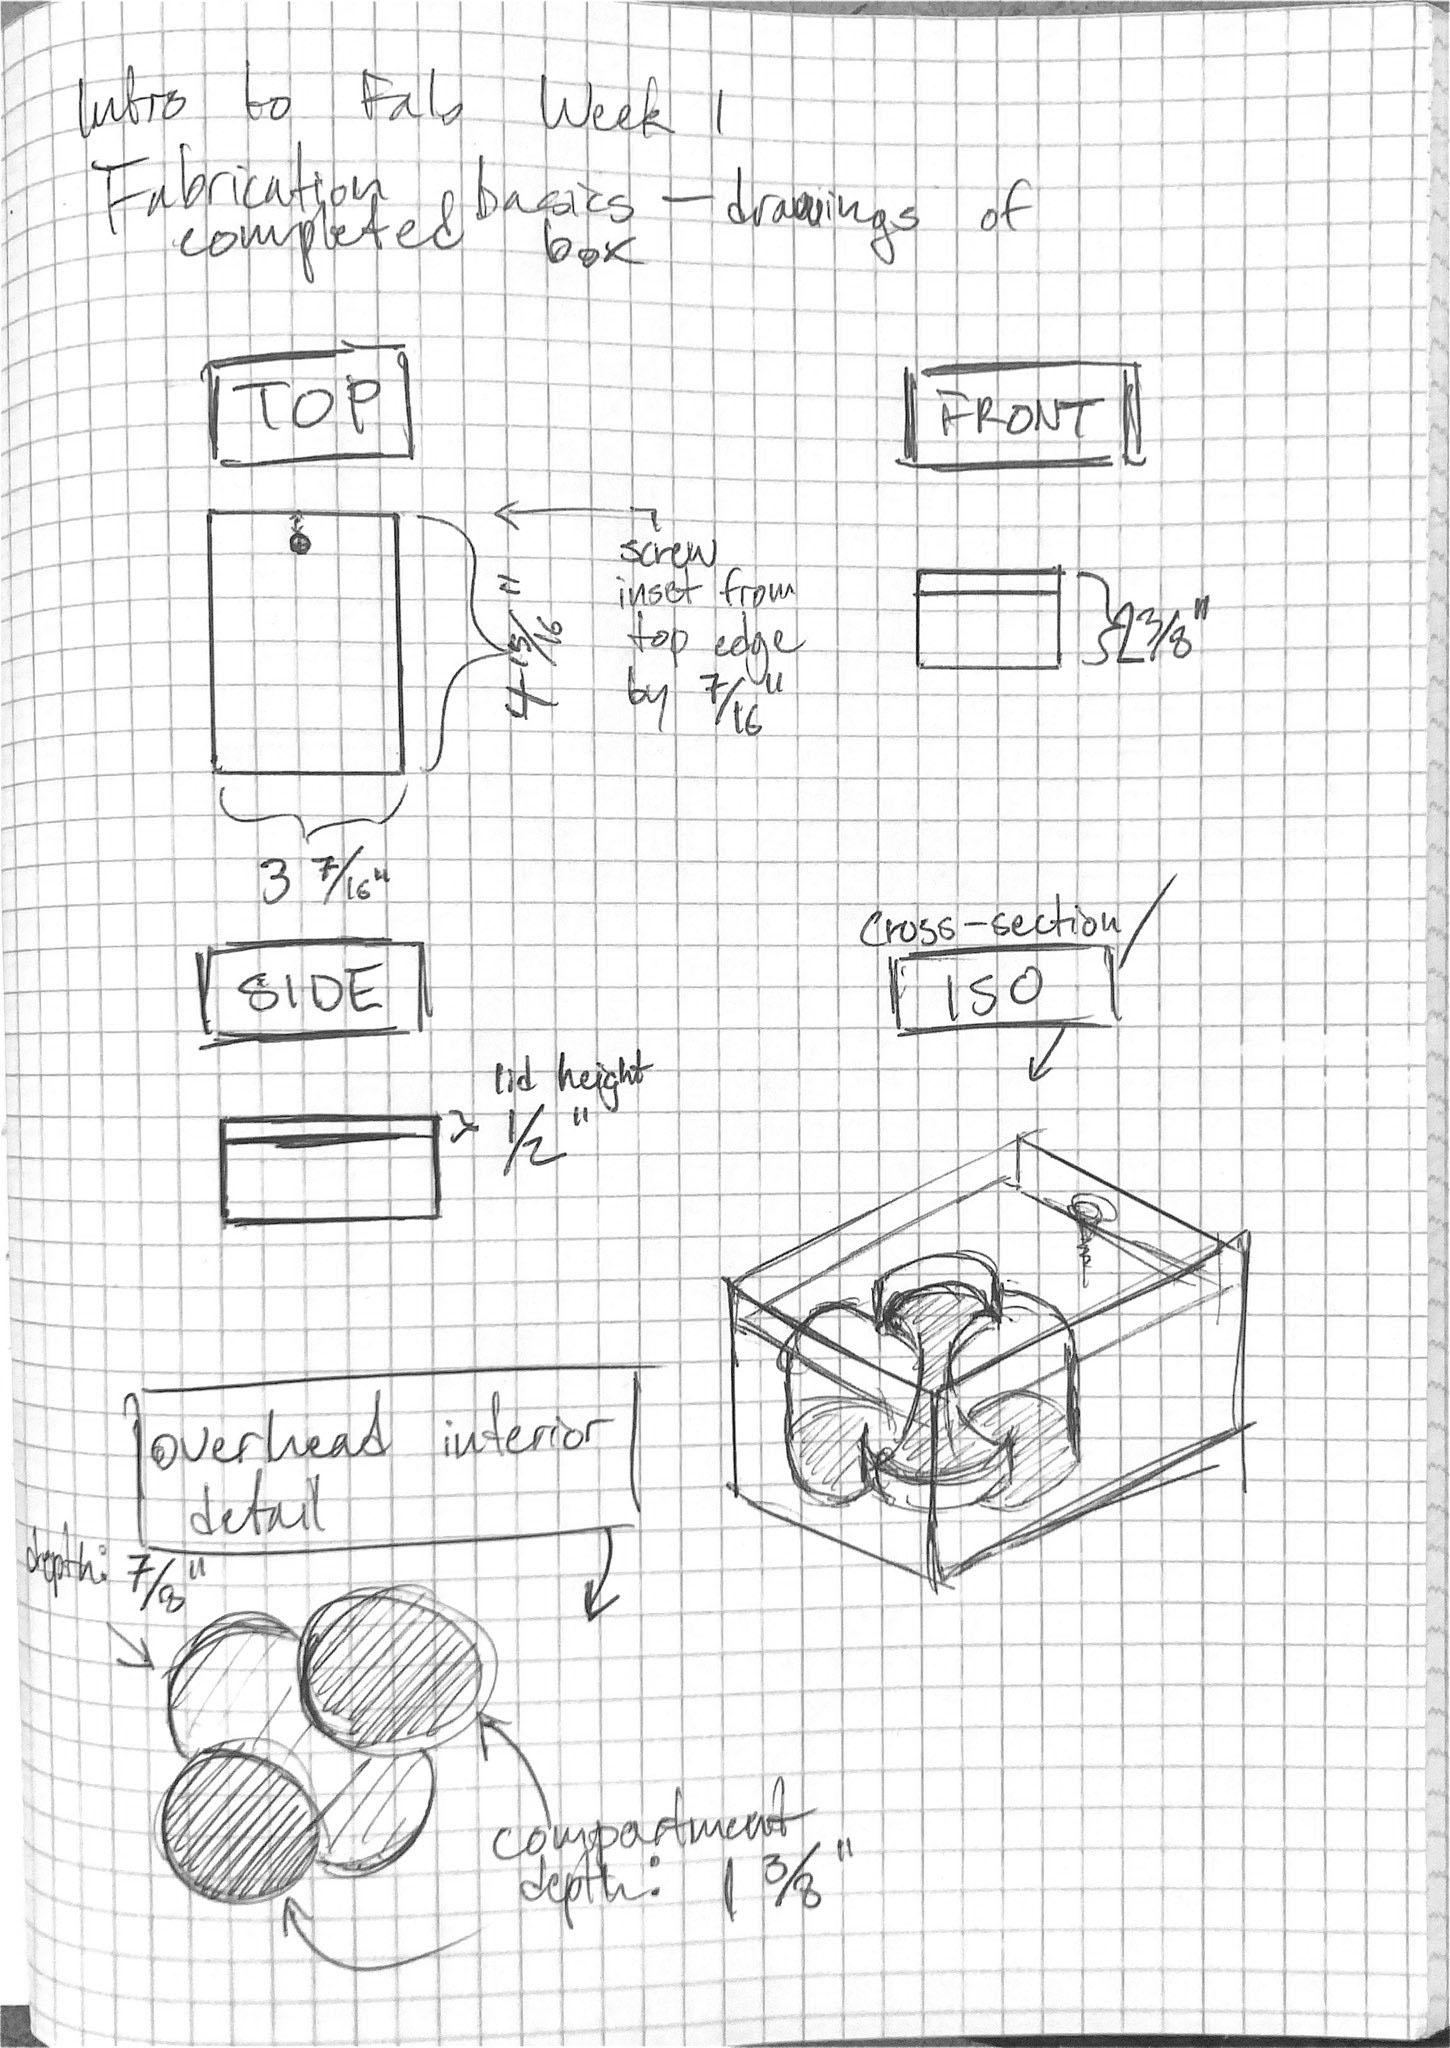
Finally, here's my post-construction drawings, with measurements taken after it was complete. Also, not visible in the photograph above, but the lid appears to have slightly warped up on the right-hand side (screw postioned far from viewer) over the weekend between build days.
–1/30/23