
Intro to Fabrication - Week 2
Five identical objects
I’ve settled on the theme “division” for my projects in this class–think objects for organization like the box with the split compartment from last week, or objects that can be split into multiple functional parts.
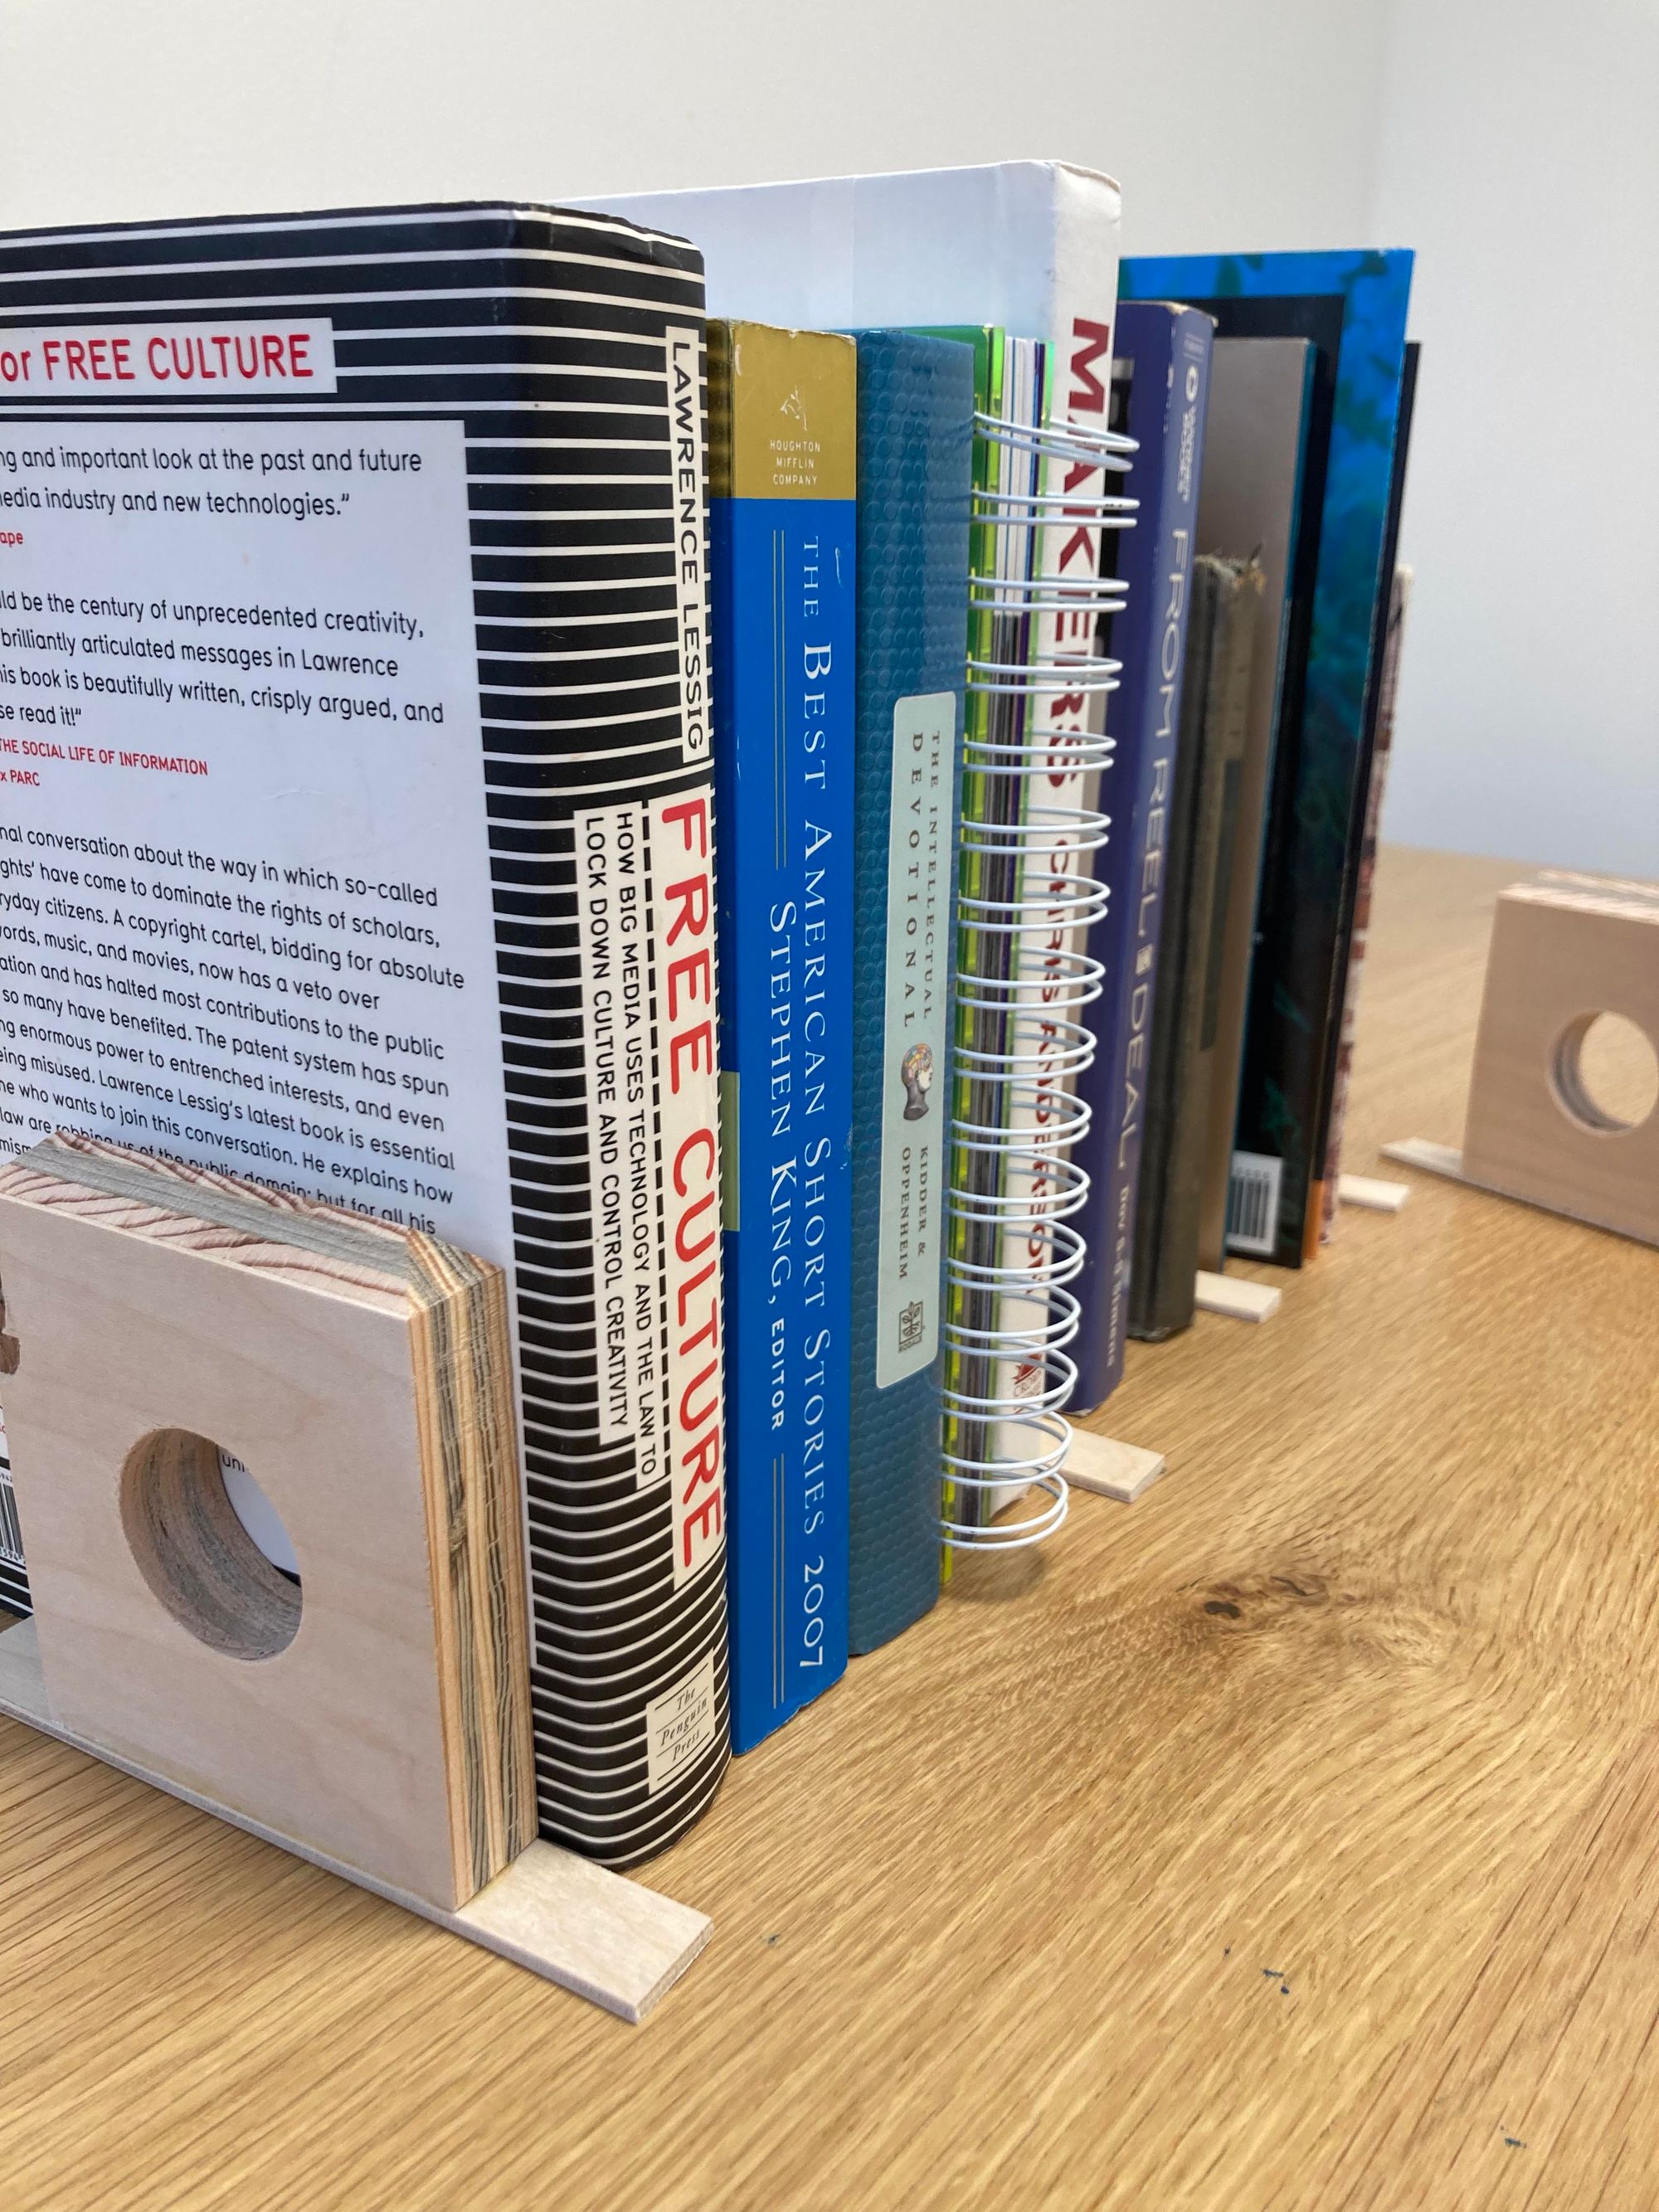
For this week’s homework assignment, making five identical objects, I decided to make a set of bookends.

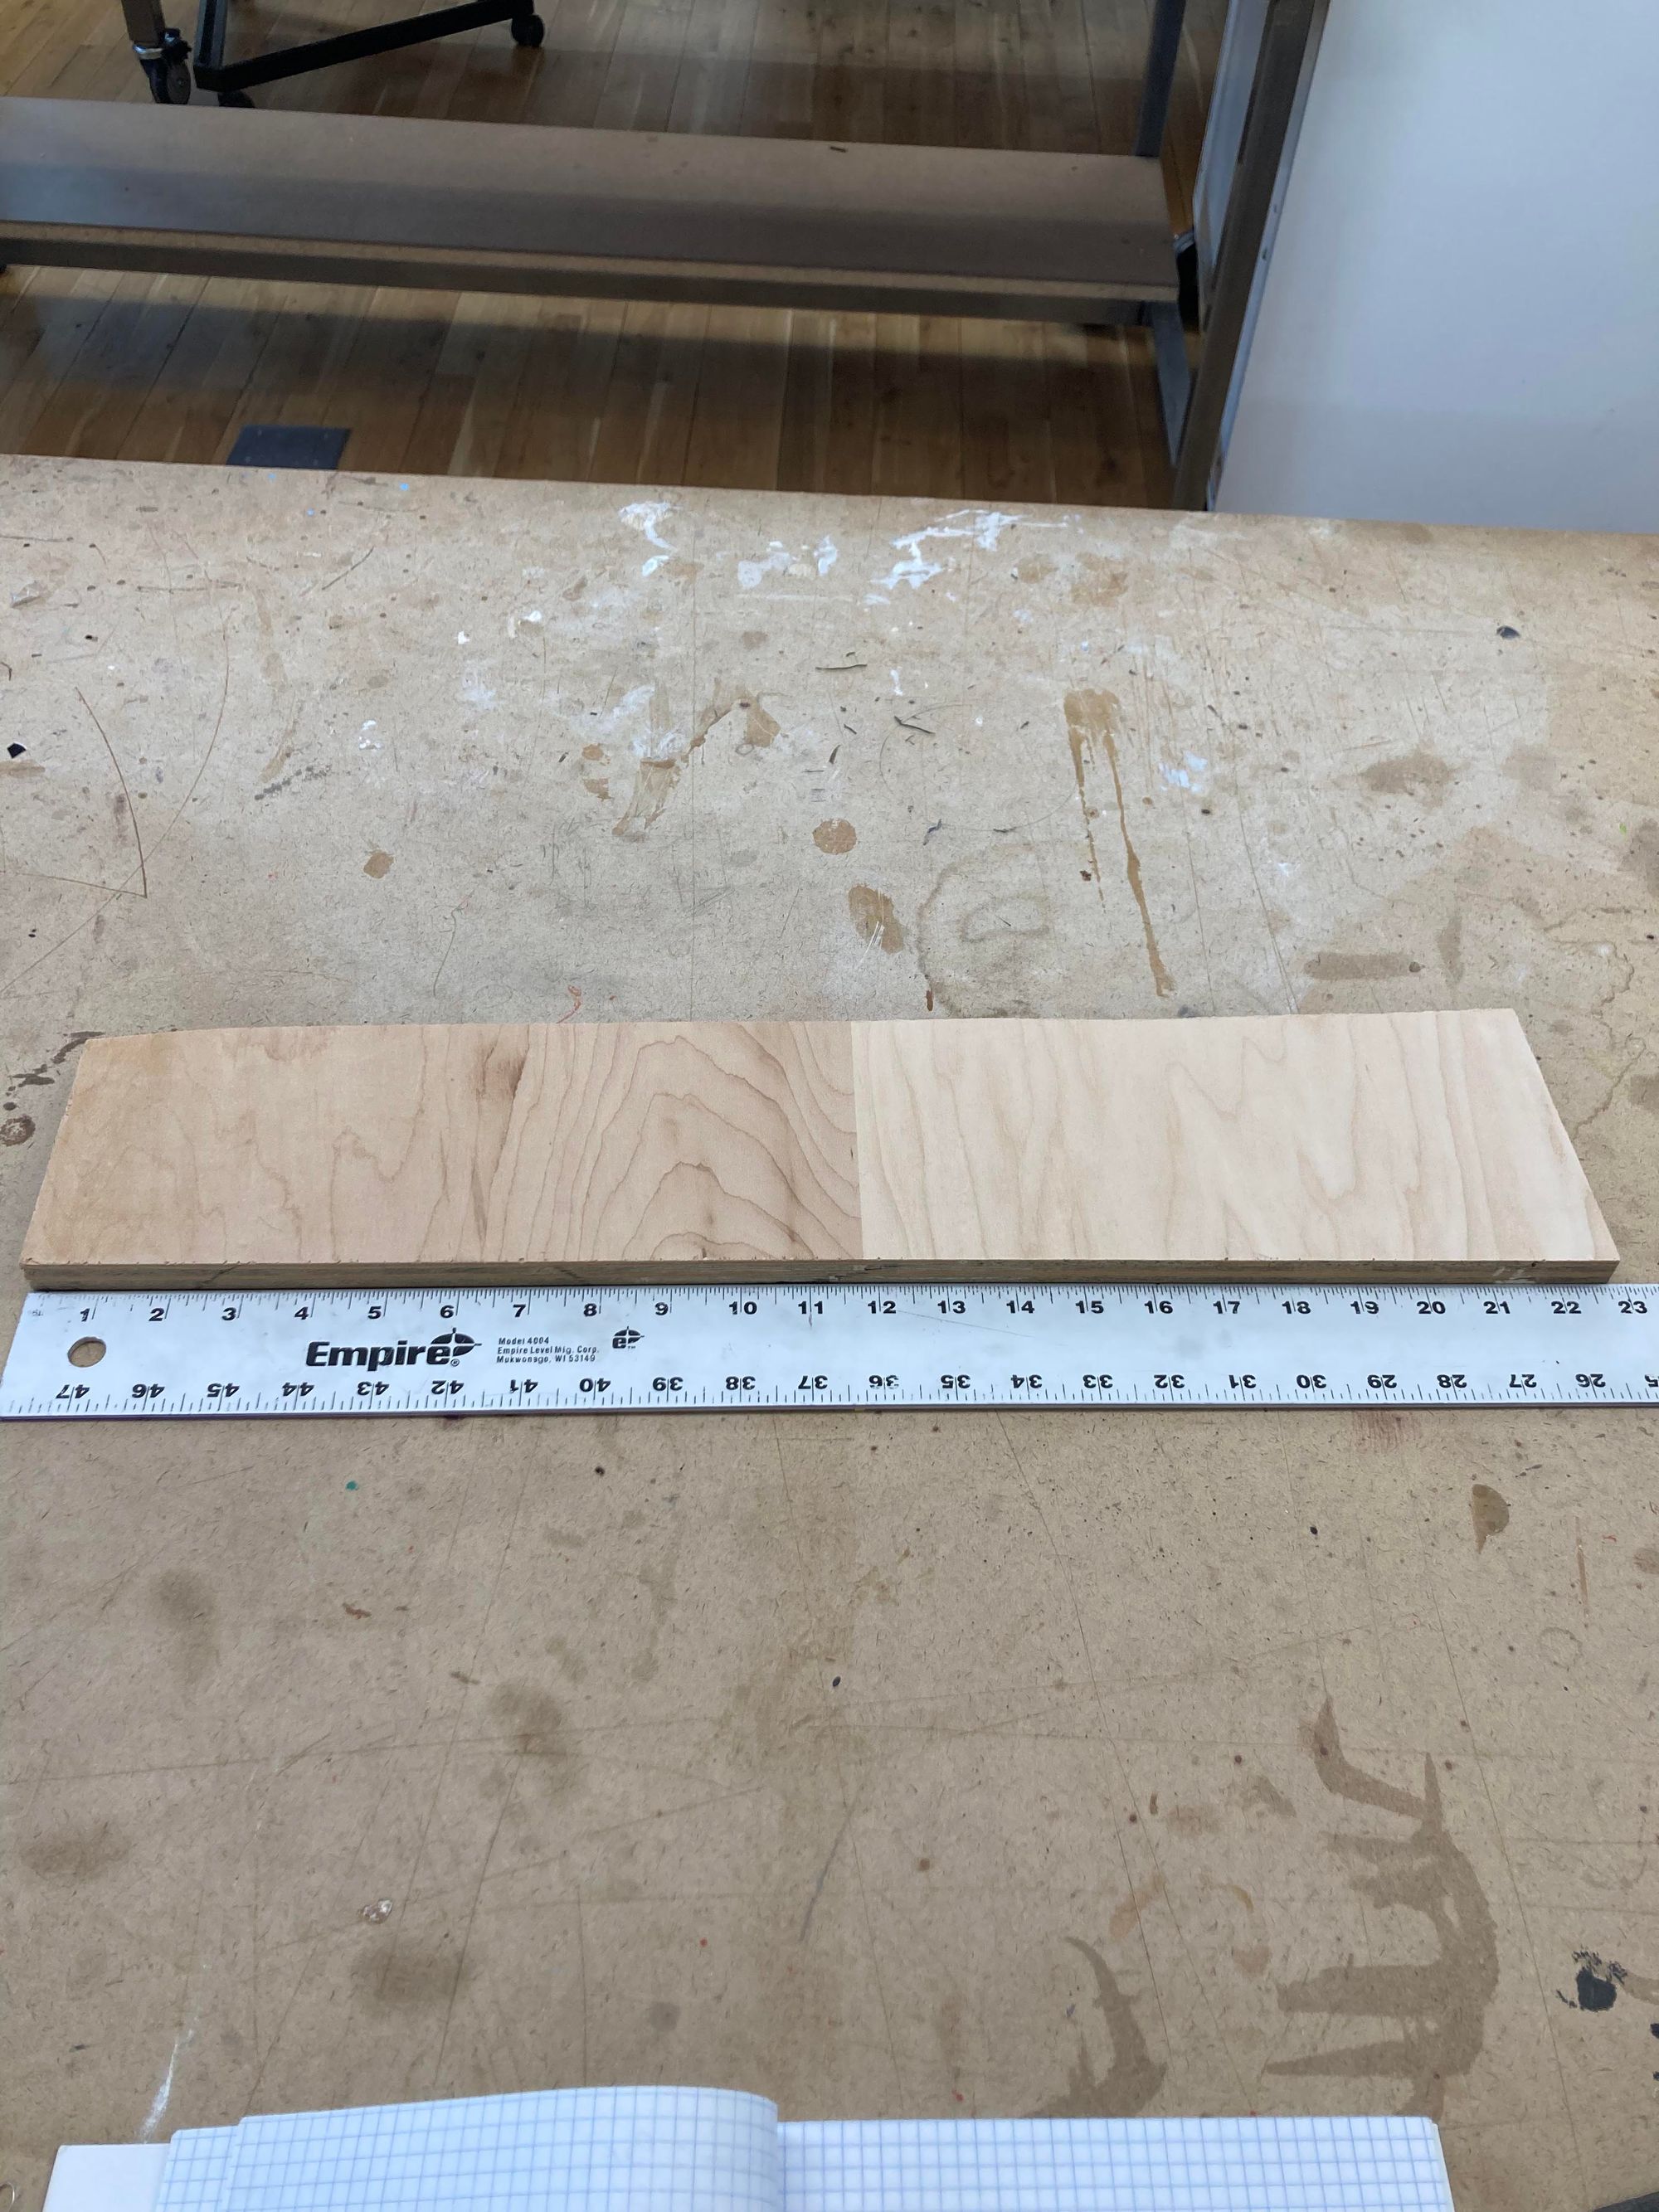
I started with a piece of plywood scrounged from the shop, roughly 22 inches long by 3.5 inches tall with a depth of ⅝ inches. I planned to part it out into 5 pieces each about 4 inches long, the height of the bookend sans base. I later settled on using another piece of scrounged ply about ⅛ of an inch thick (clearly leftover from a laser cutter project) to cut into strips to form the base of each bookend.
Note: these bookends ended up even smaller than originally planned and the design of the feet is not the most stable, though I will note they’re harder to knock down with the base than if I had left that out. I could see using these for smaller paperbacks or DVD cases, but I wouldn’t trust them to keep anything larger than that from toppling over. Oh well, plenty of people like organizers that are basically just decorative, right?
I parted out the 5 bookends using the bandsaw, then sanded the tops, bottoms and sides to square them up. Per Phil’s suggestion, I used double-sided tape to join them together as a block during this sanding stage to get them relatively uniform.
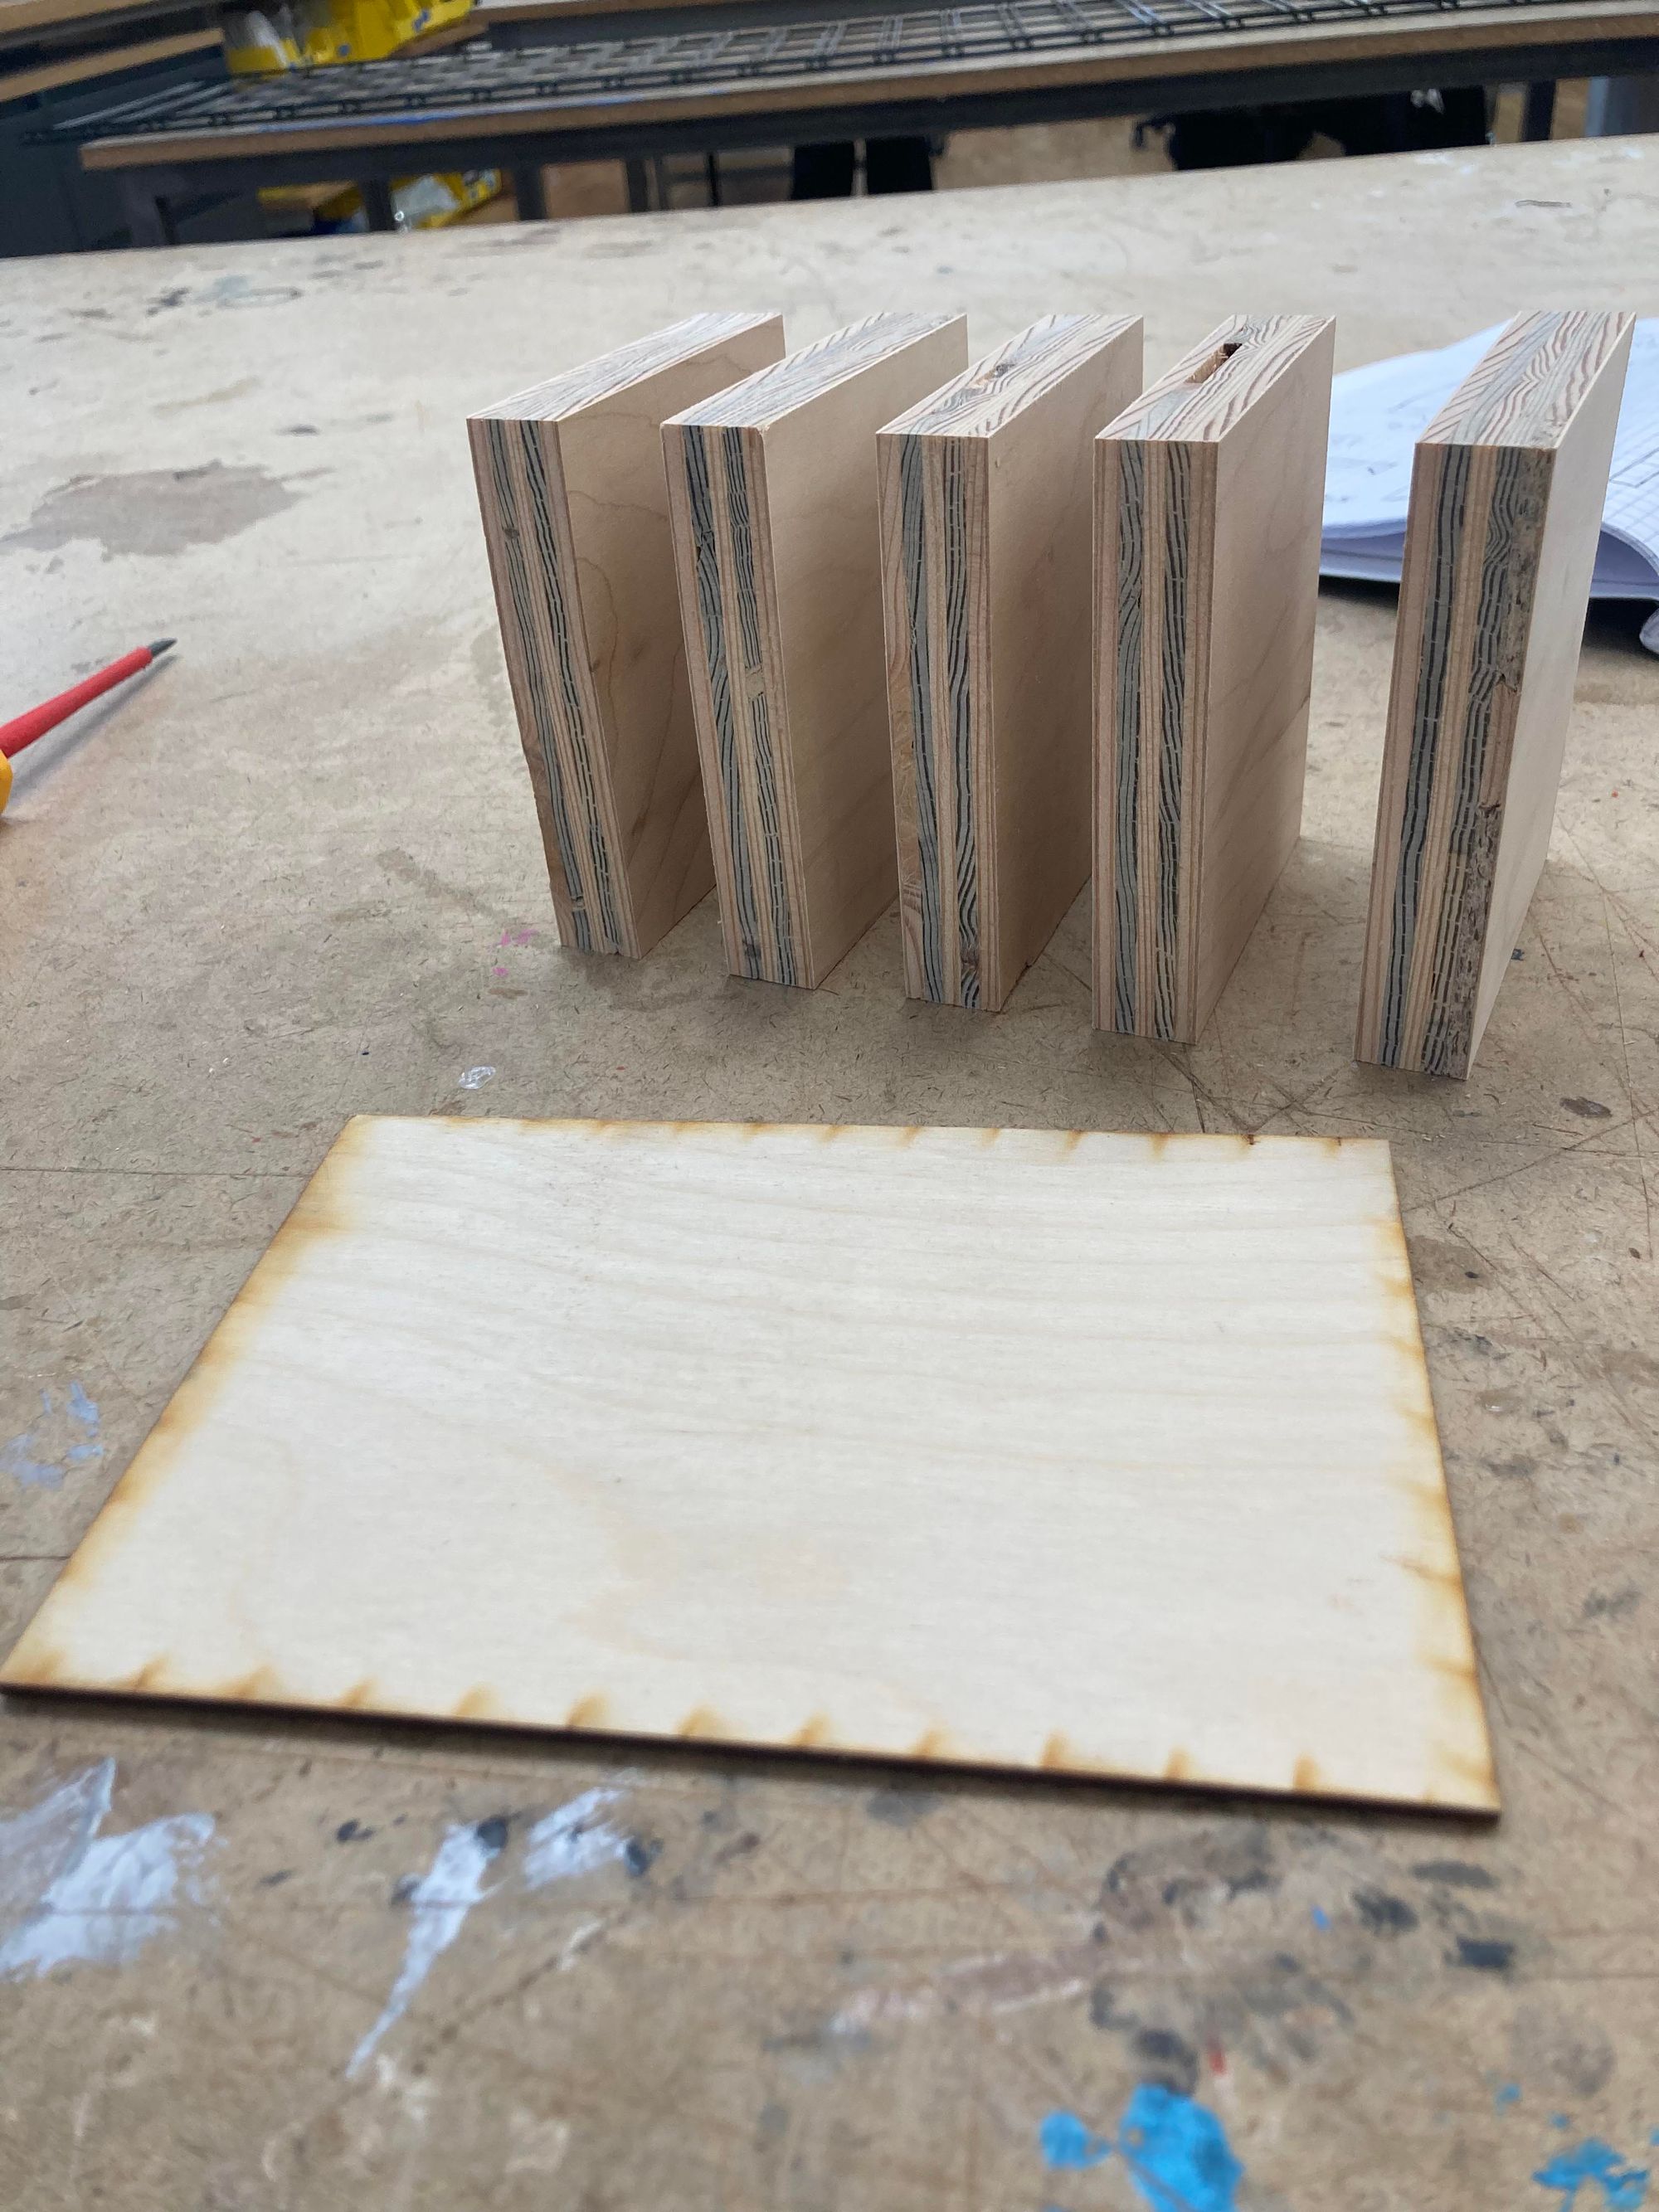
The tops of the bookends featuring the 45-degree bevels gave me some pause. Each piece is too small to safely make the trims using a miter saw. I took off the corners from the front-on view using the bandsaw and mite gauge, leaving the longer side-on cuts. My instinct said removing that little material was probably a fine job for sanding, and Phil agreed given that we haven’t gotten to using routers yet–keeping that in mind for the future!
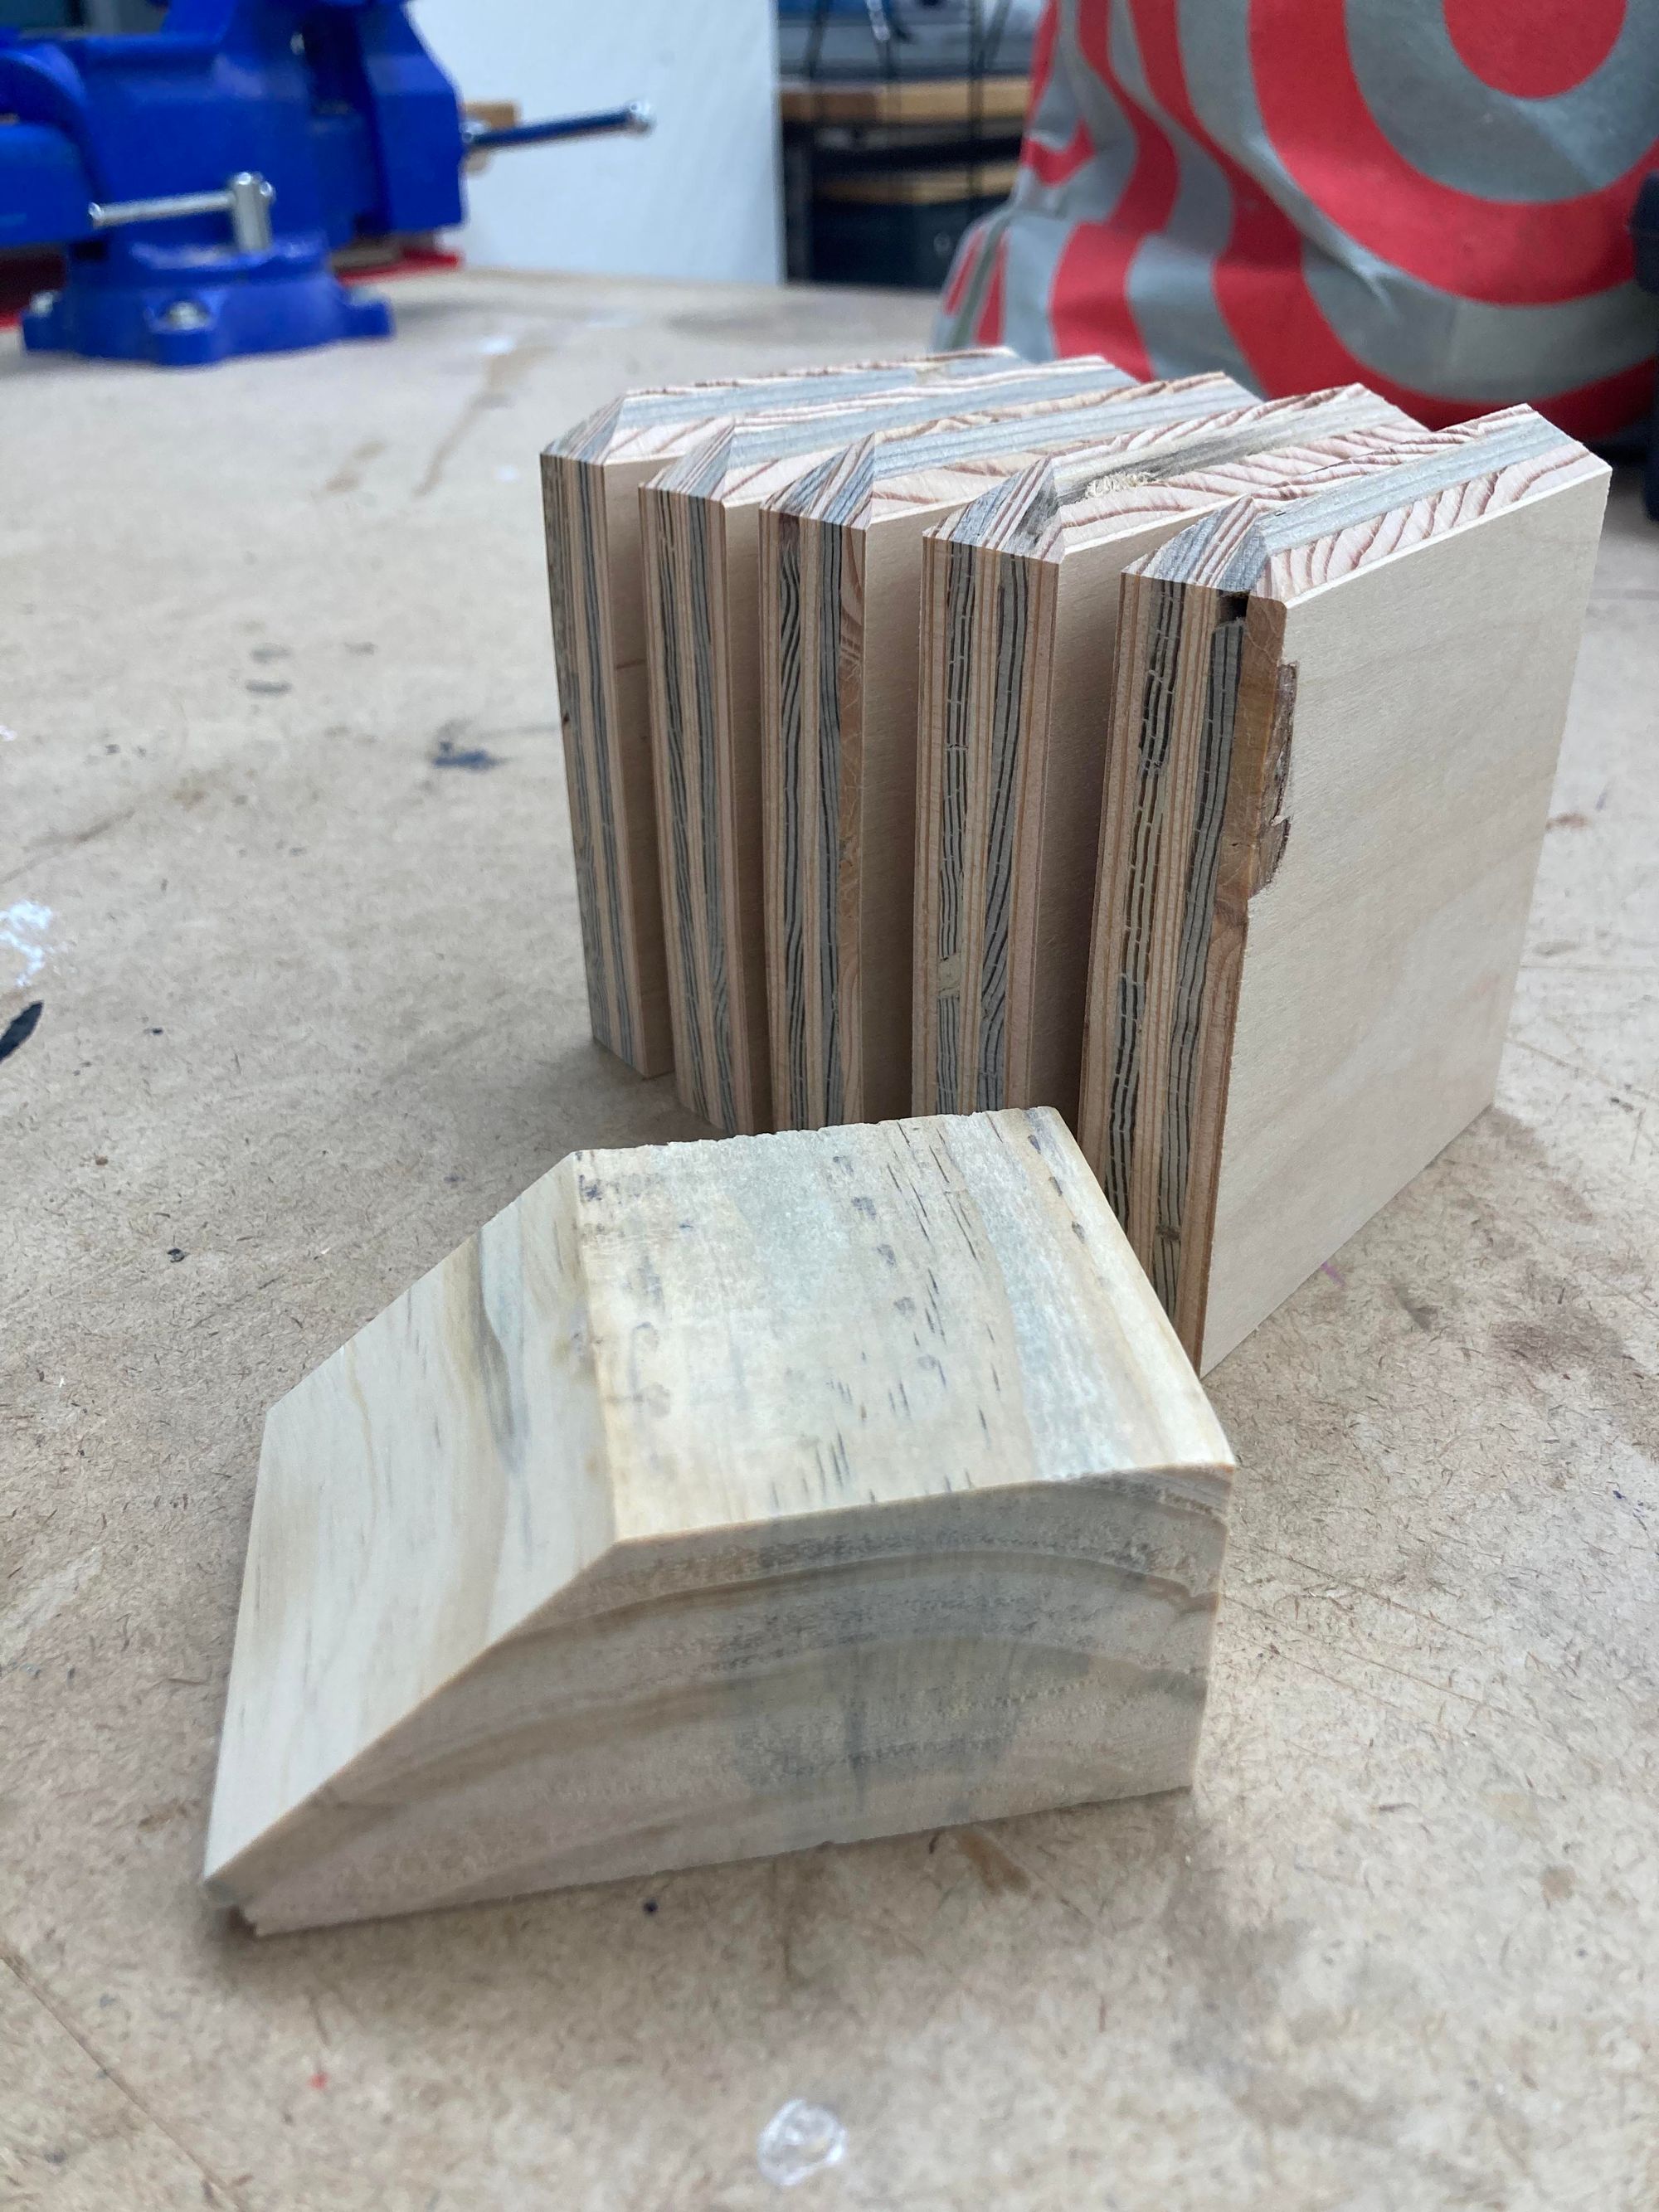
I scrounged another small piece of wood and made a 45-degree angle cut as square as I could to give me a base against which I could place each bookend and then slowly sand down the edges until they met in the middle. This went a long way toward ensuring uniformity and repeatability, but in the future I think I’d want to spend a bit more time making a jig that’d make it easier to square up the edge of the piece with the sander.
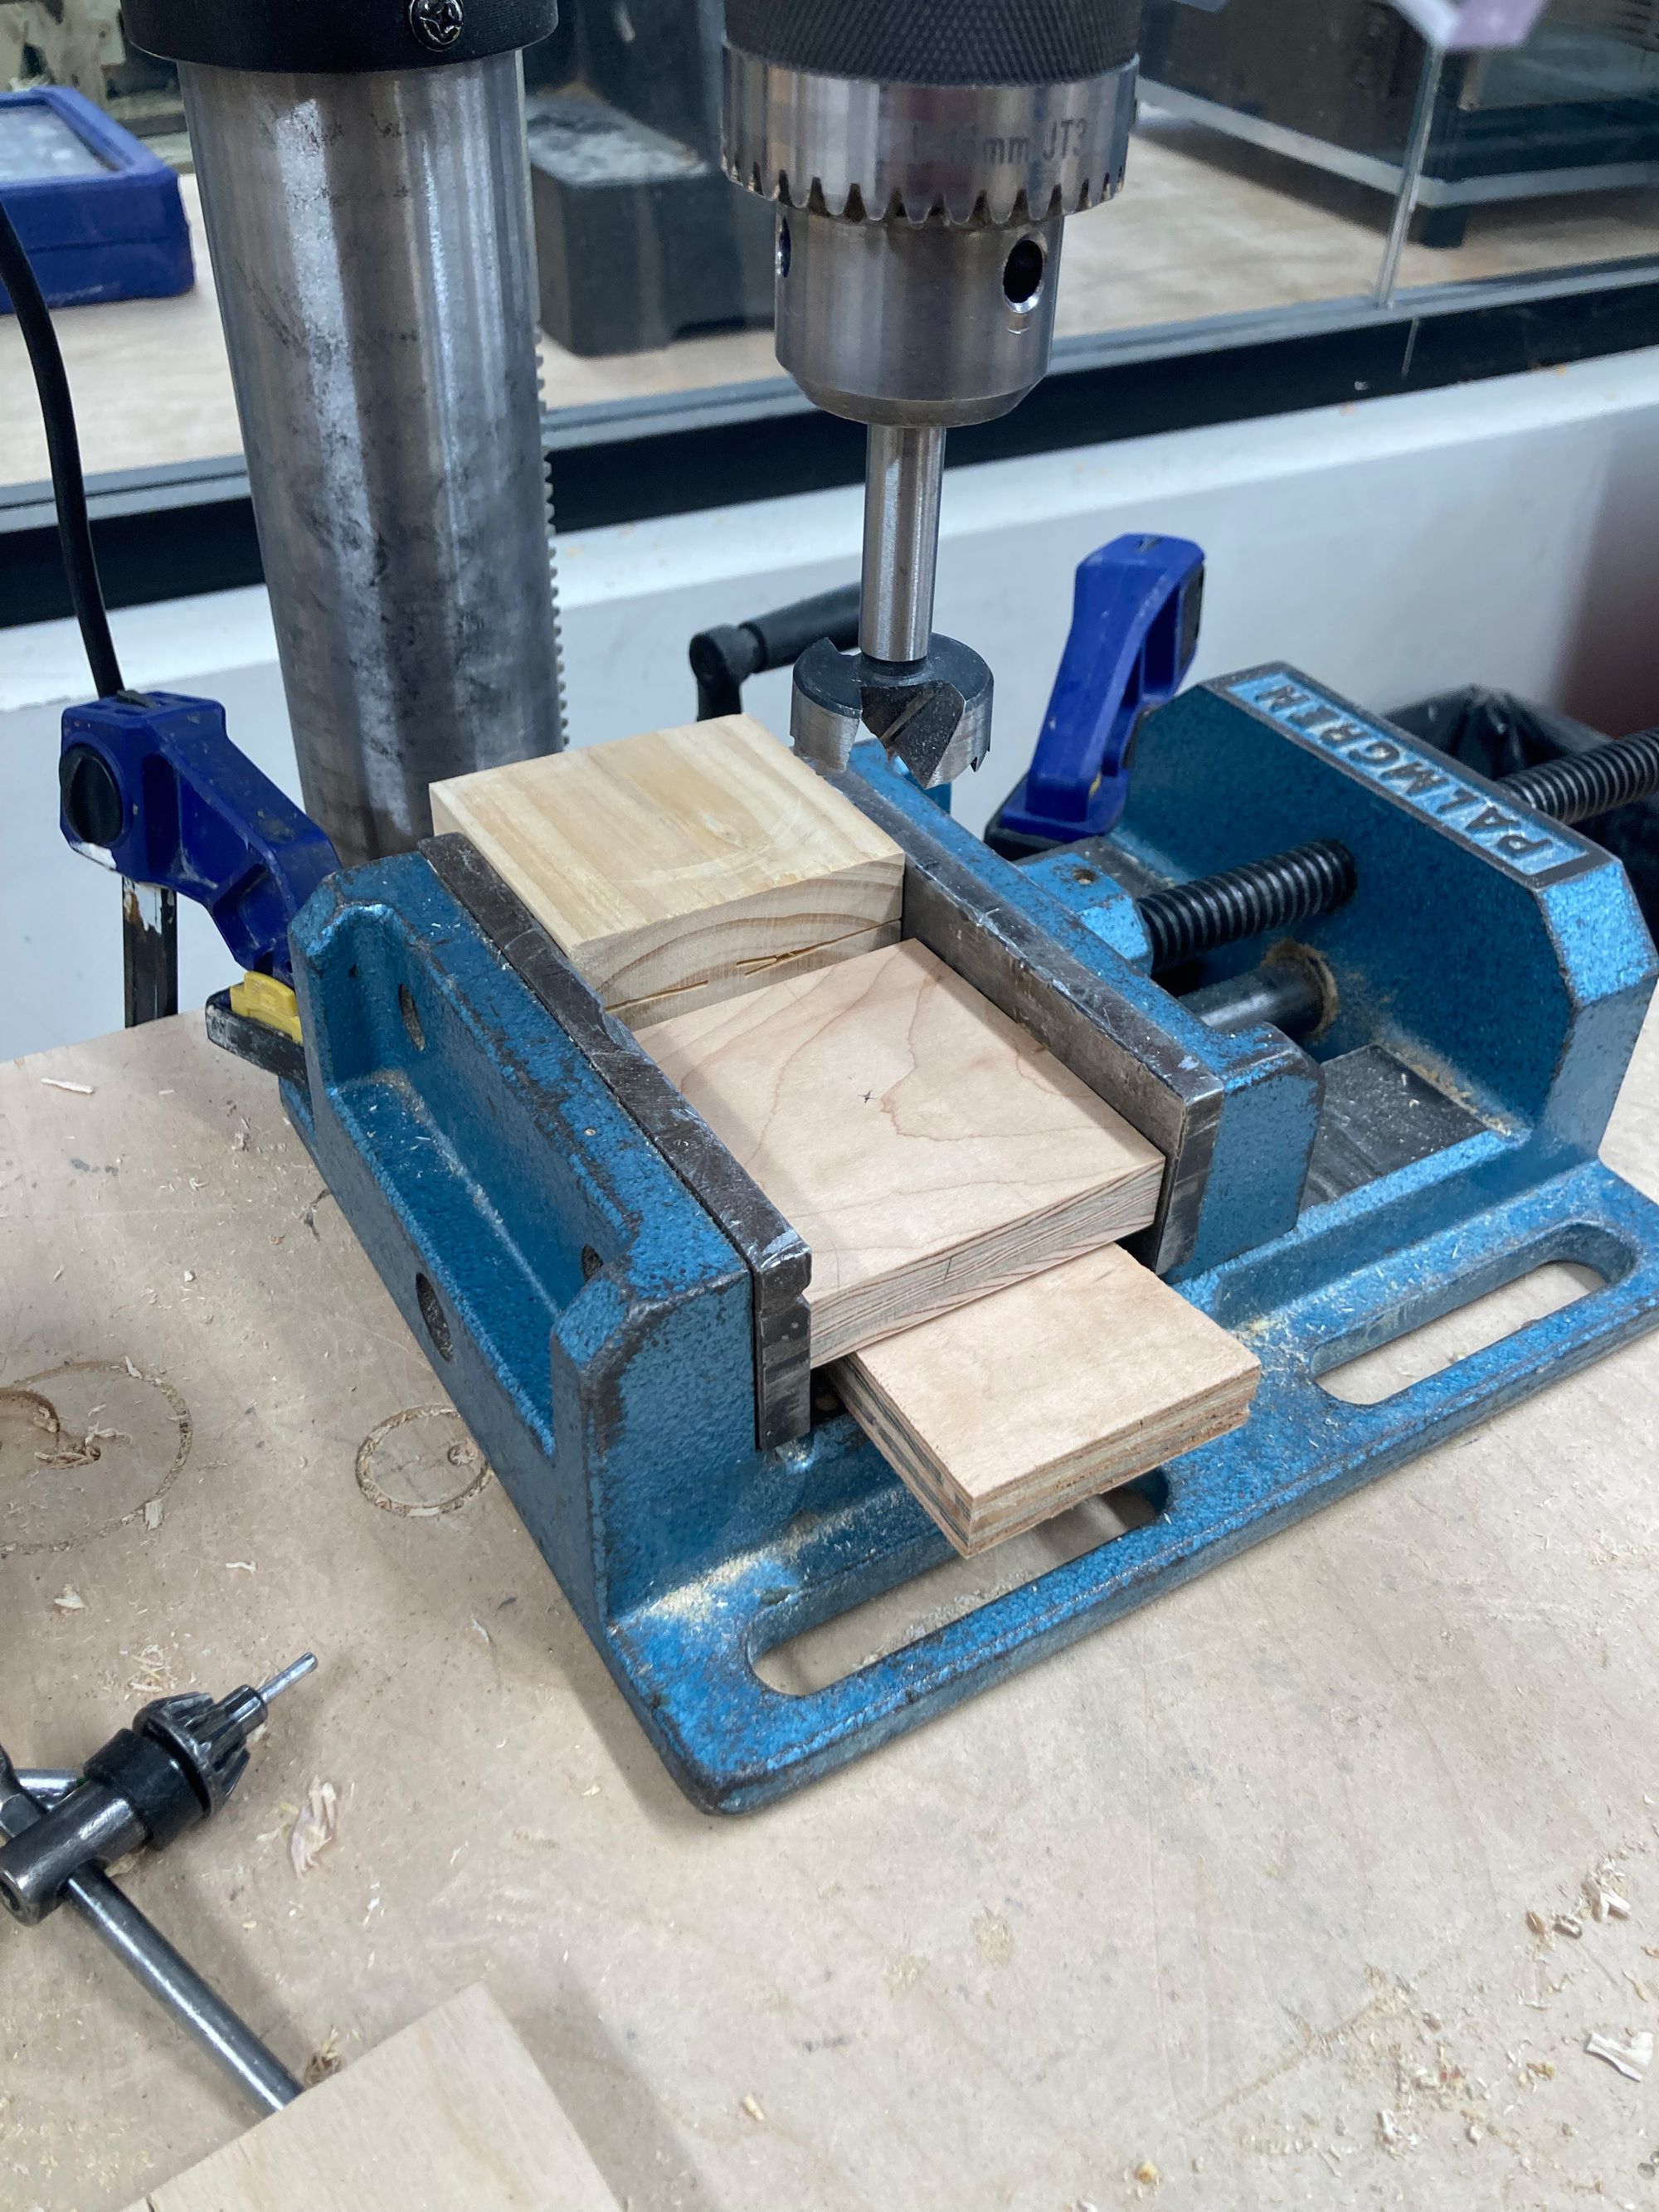
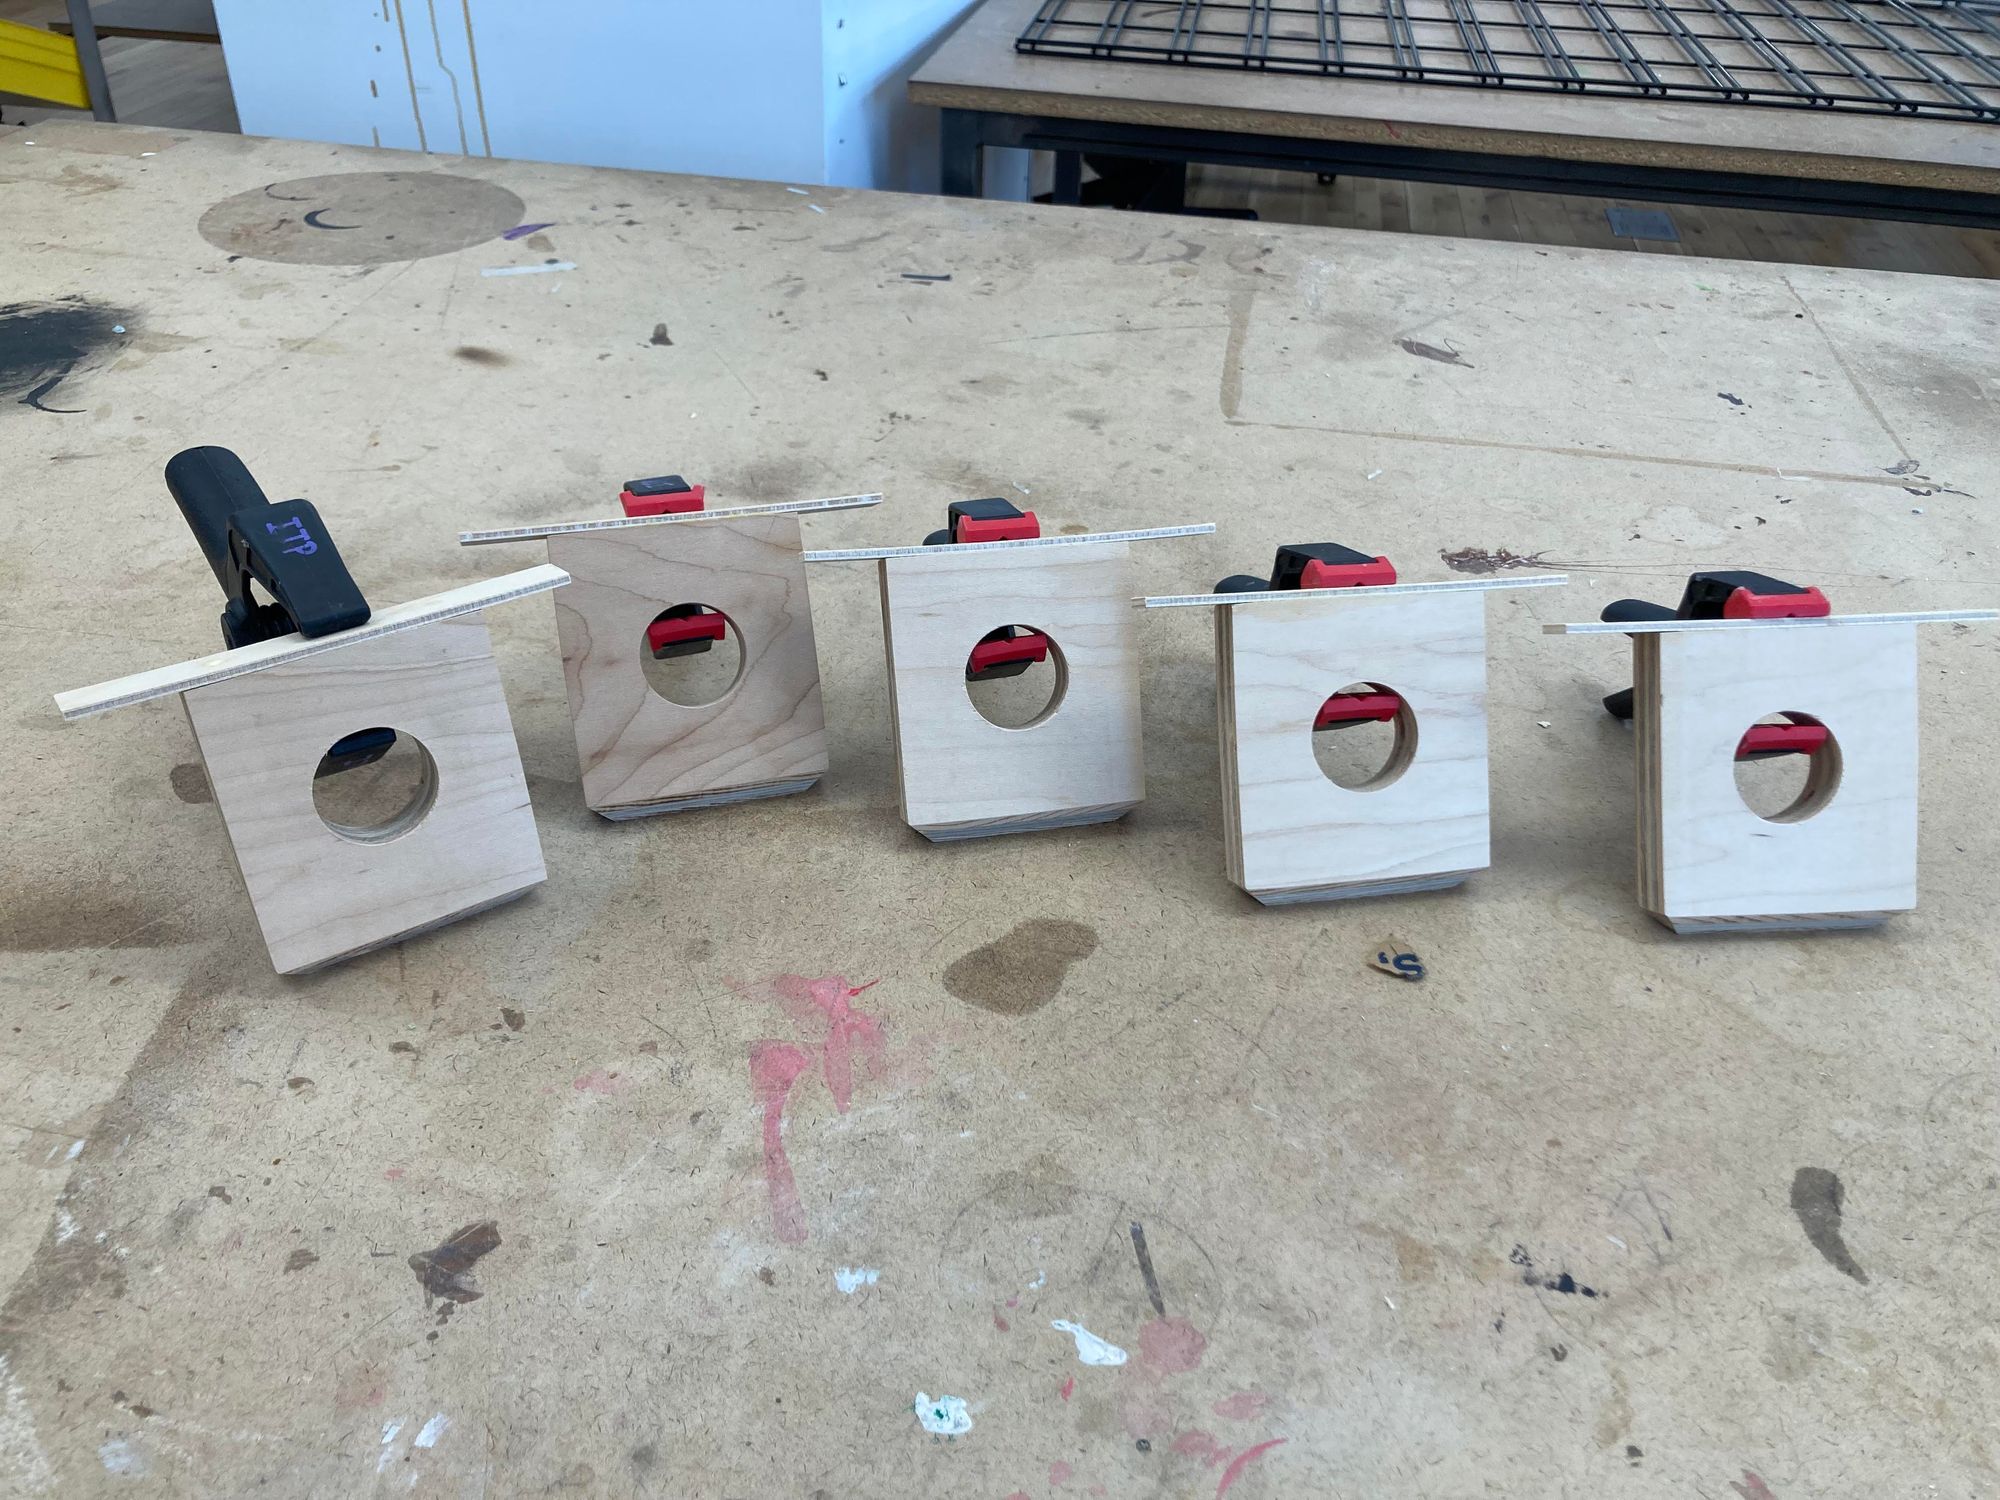
Then I put together some more scrounged wood for a centering jig to drill out the hole in the middle of each bookend, making sure to clamp the vice in place to the drill press platen. Of all the aspects of these pieces, I’m pretty pleased with the alignment of these holes.
Making and affixing the bases to each piece is probably what I’m least satisfied with. Parting out strips this small on the bandsaw would have gone better if I had more material to begin with, but I was only left with the tiniest scrap strip after the fact and couldn’t do anything about the pieces being smaller than I’d planned for, thinking I’d have more wiggle room for sanding later. I initially planned to use wood screws, but I learned the hard way that drilling into the side of plywood like this can go quite poorly. The one bookend I tried this on now has a small split and bears the evidence of the drilling attempts.
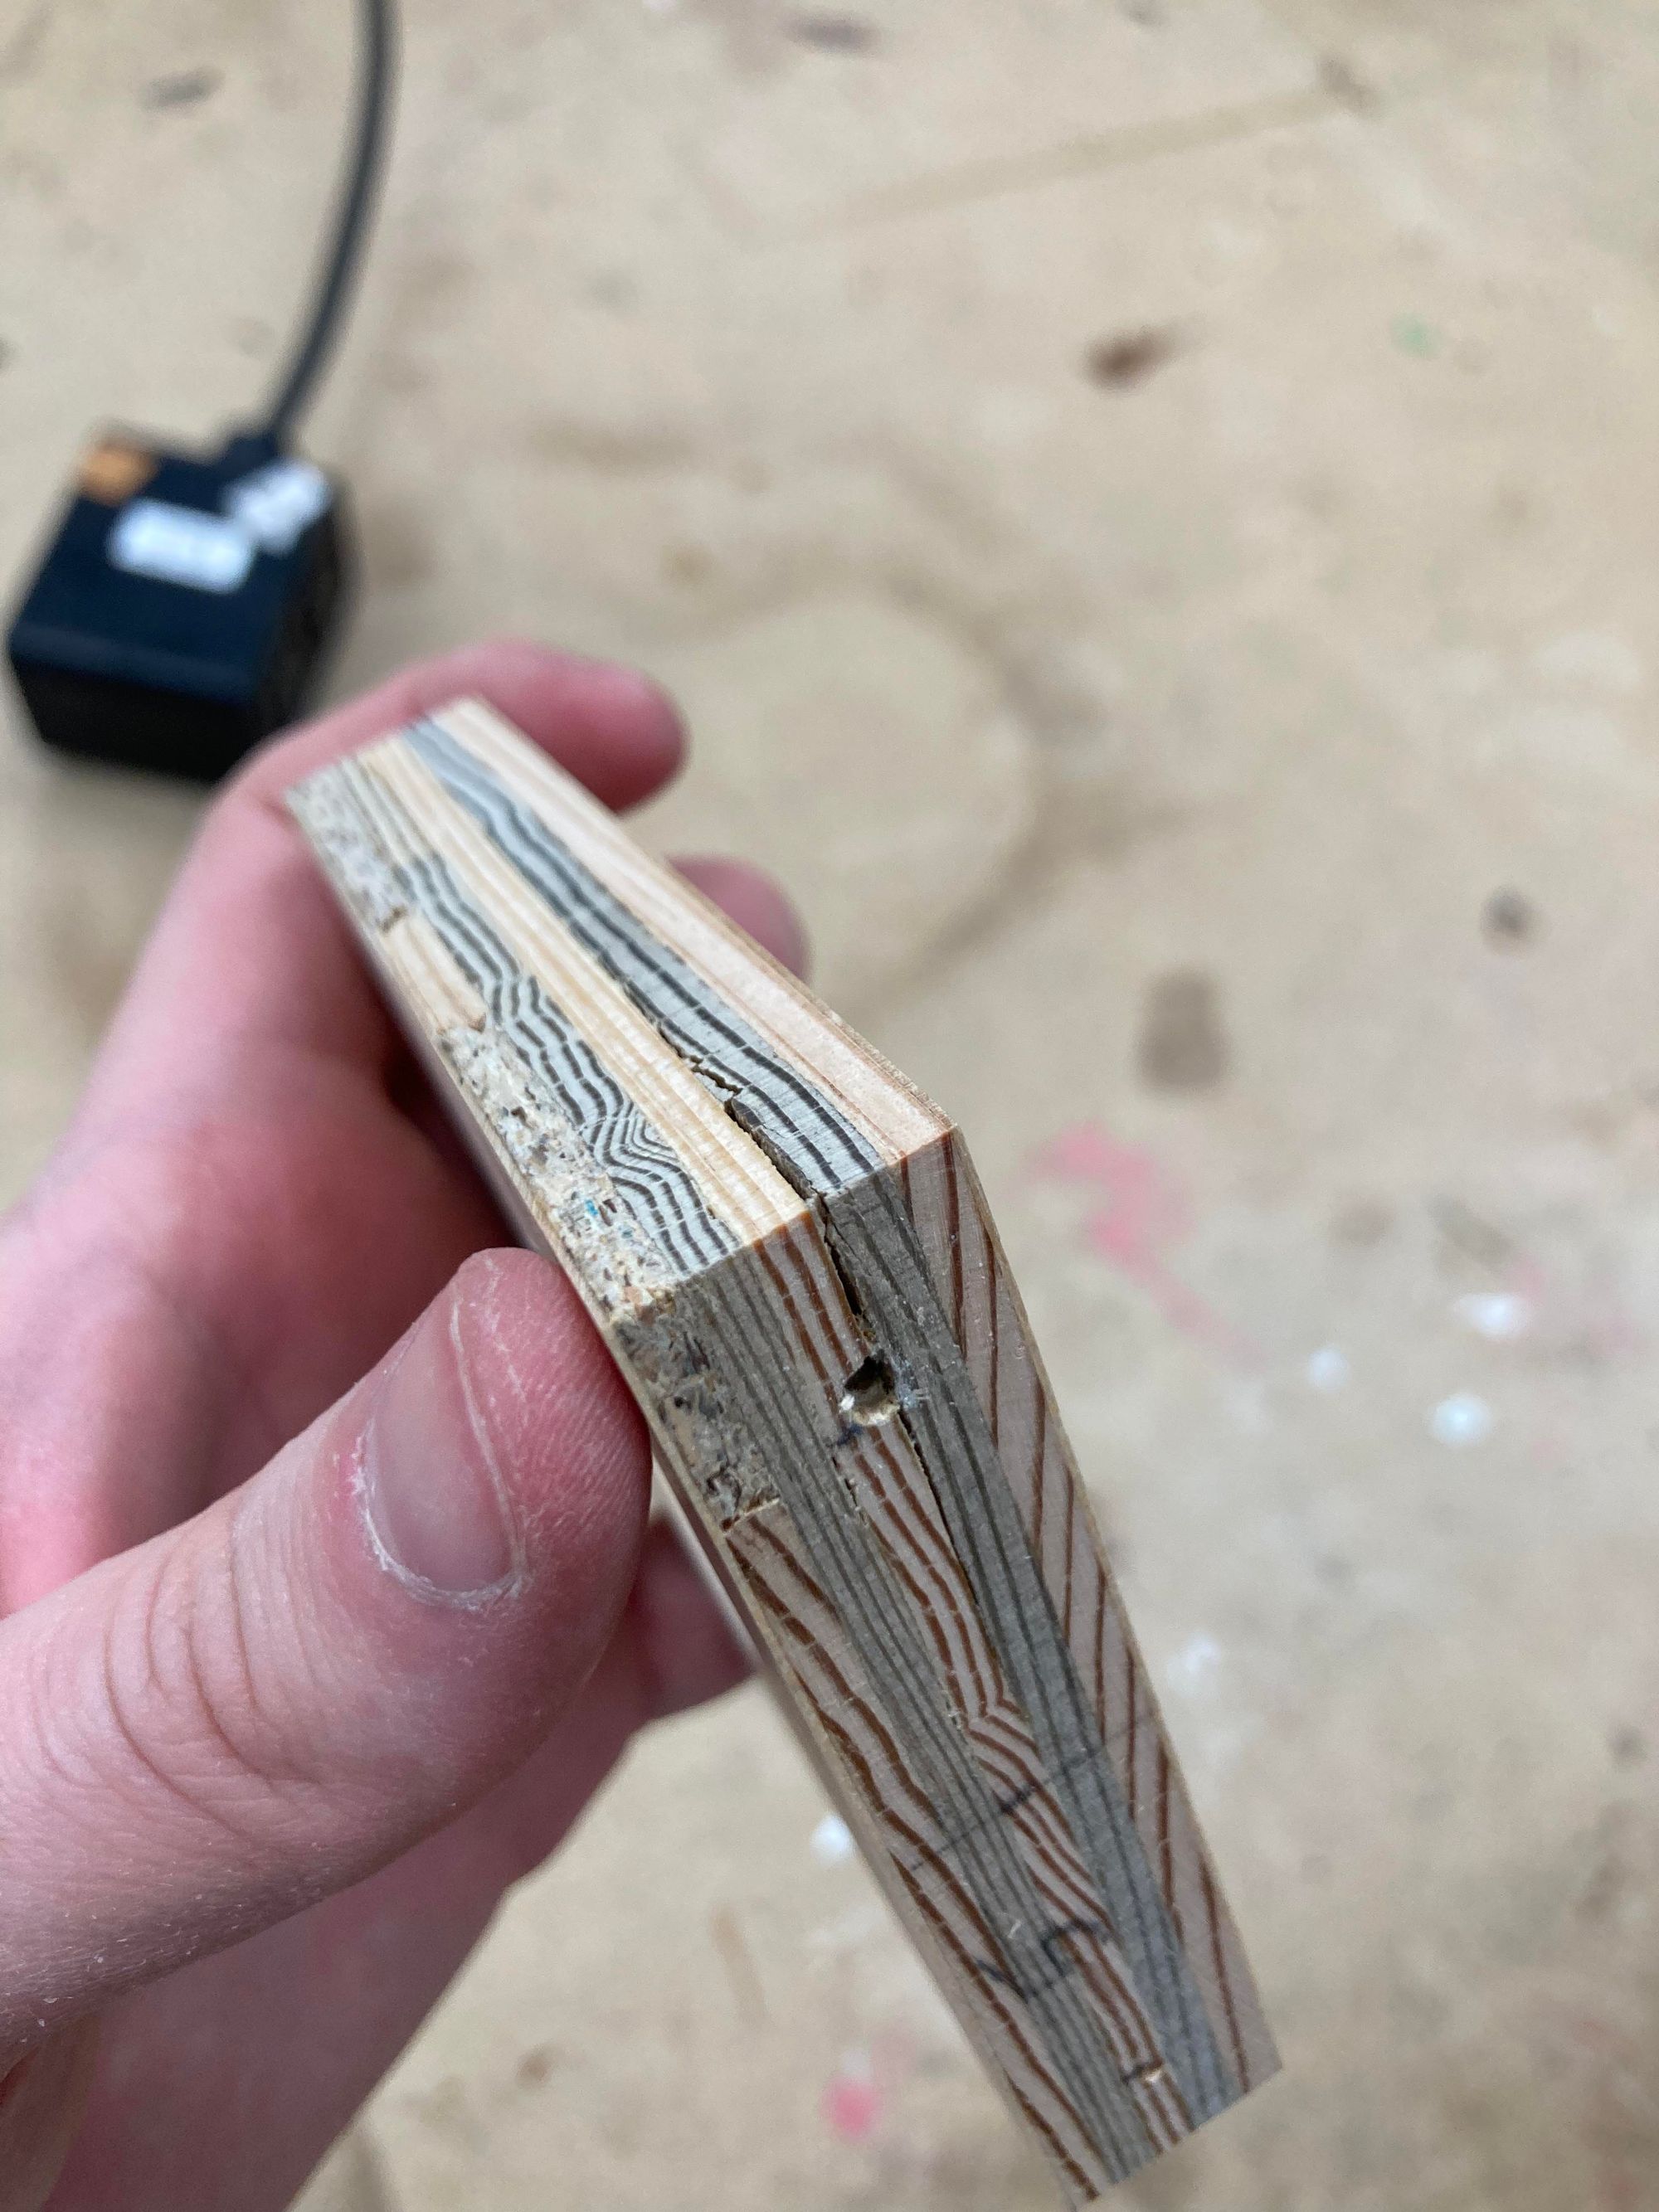
So it goes. I ended up attaching the bases using wood glue, and I scored the underside of the bookend bodies with an Xacto knife before gluing. Not sure if it was just the shape of the wood or if it happened while clamping, but all of the bases are ever-so-slightly bowed downward. At least it’s uniform!
Last thing I did was sand some of the edges and the inside of the holes a bit by hand. All in all, I think I’ve got a much better feeling for which of my design/fabricating habits aren’t helpful when it comes to repeatability (unfortunately, the answer is “close to all of them”).
–2/6/23