Hypercinema 10/13/22
Frame by frame
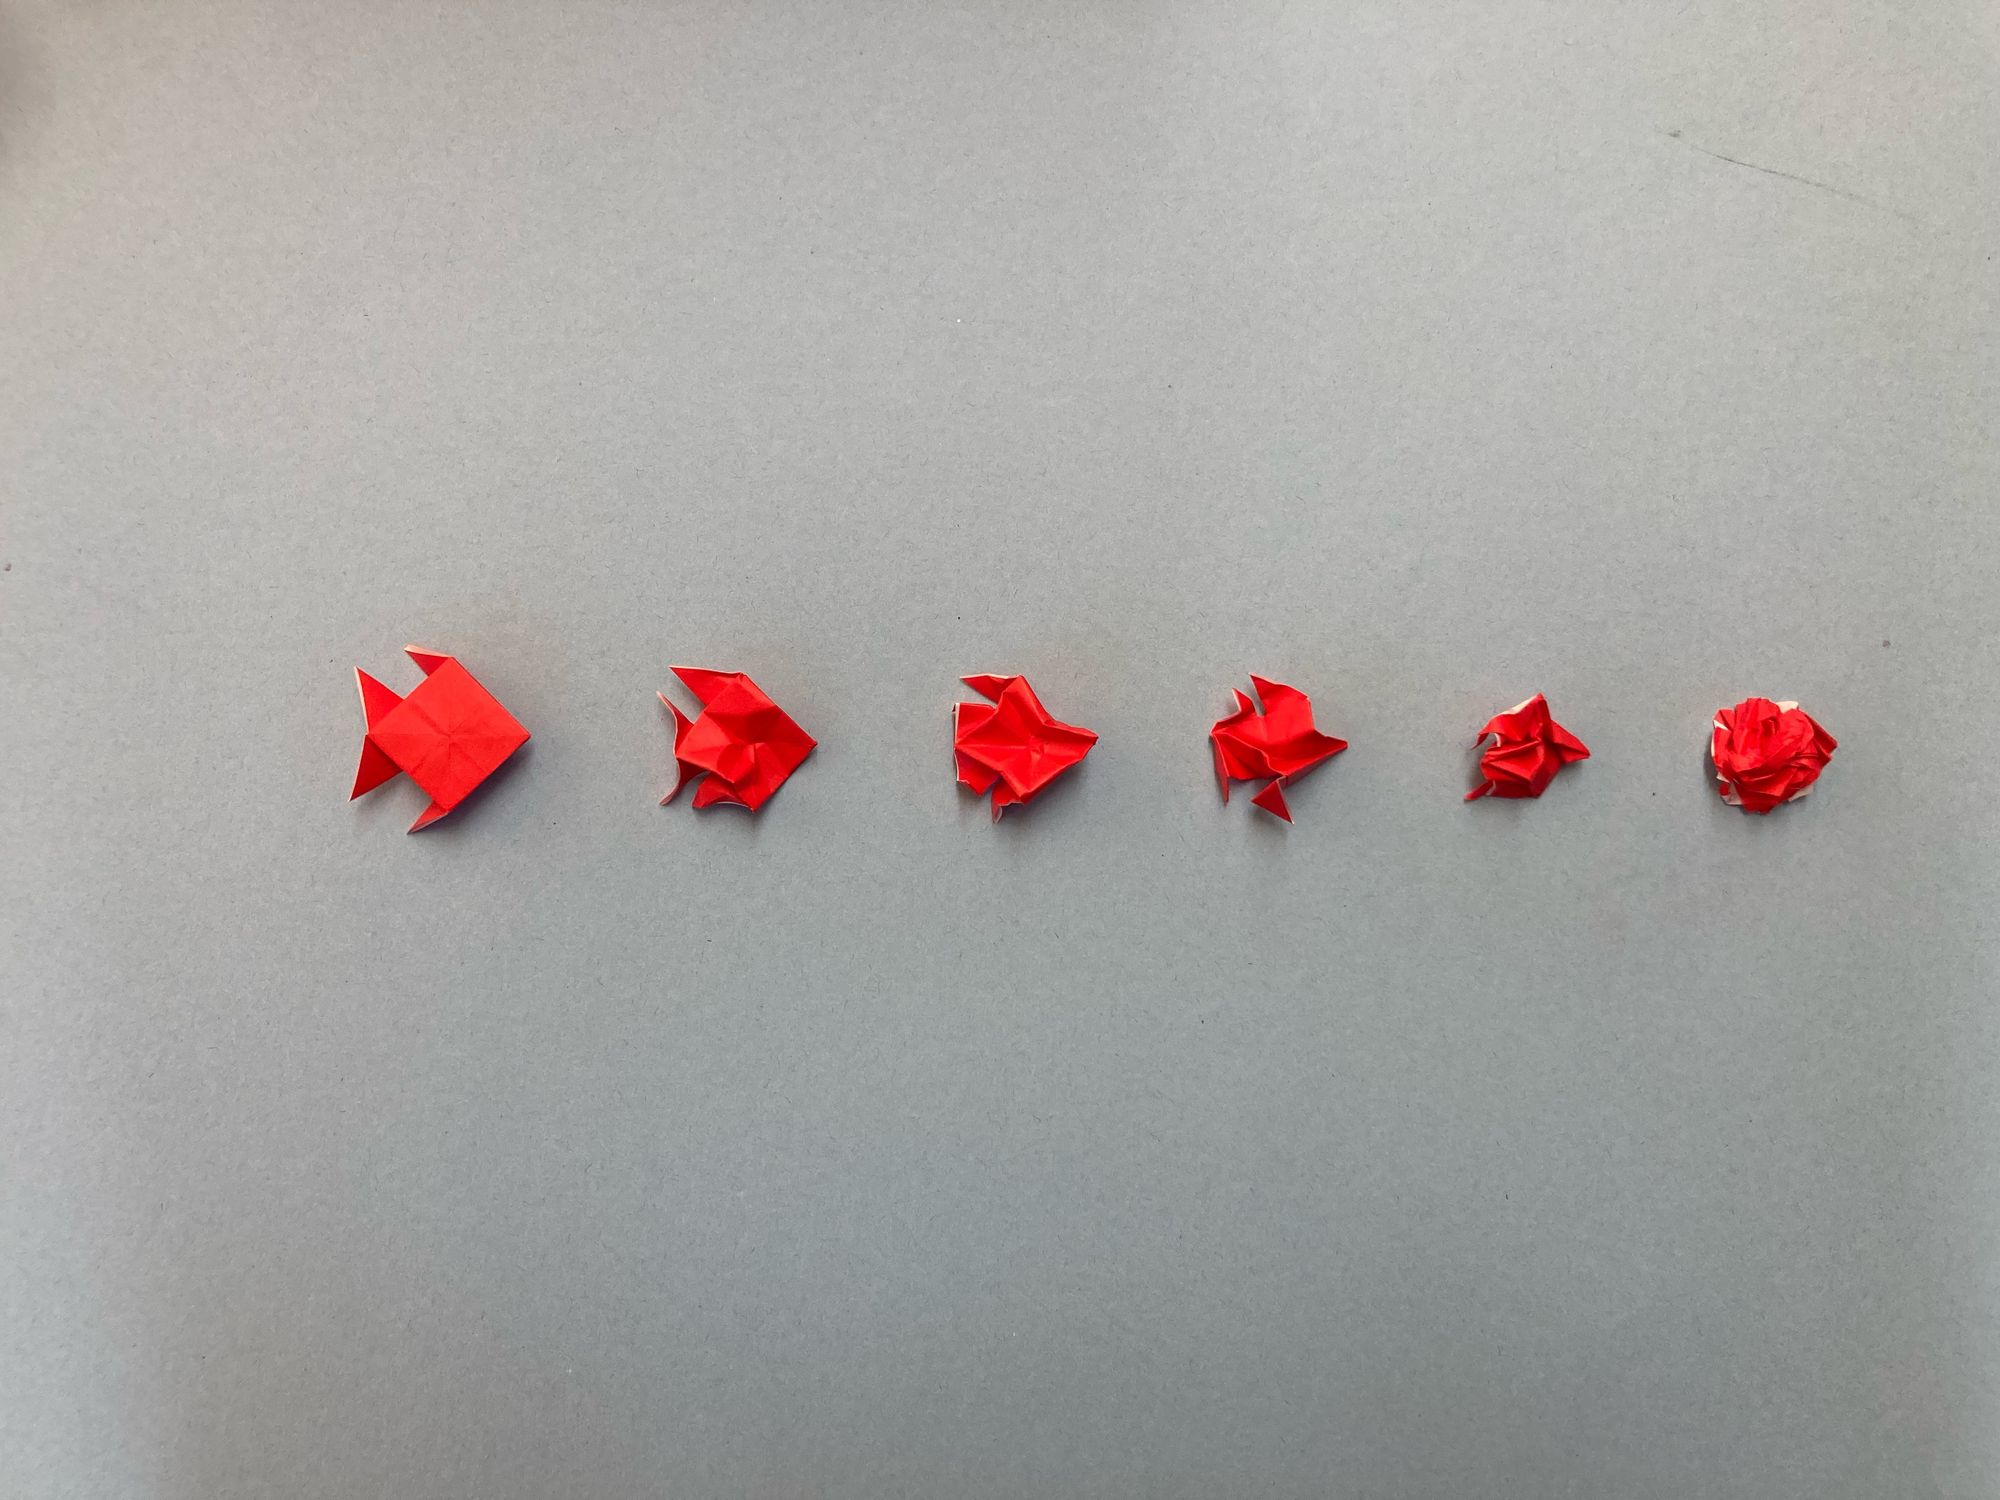
As I mentioned in last week’s documentation blog, it looked like Sim and I would need to significantly trim down our storyboards in order to get our two ideas down to a few seconds of animation. That’s what we started out with this week, removing a few story beats from our mouse (cursor) and cat chase and compressing our origami transformation idea down to only feature the fish.
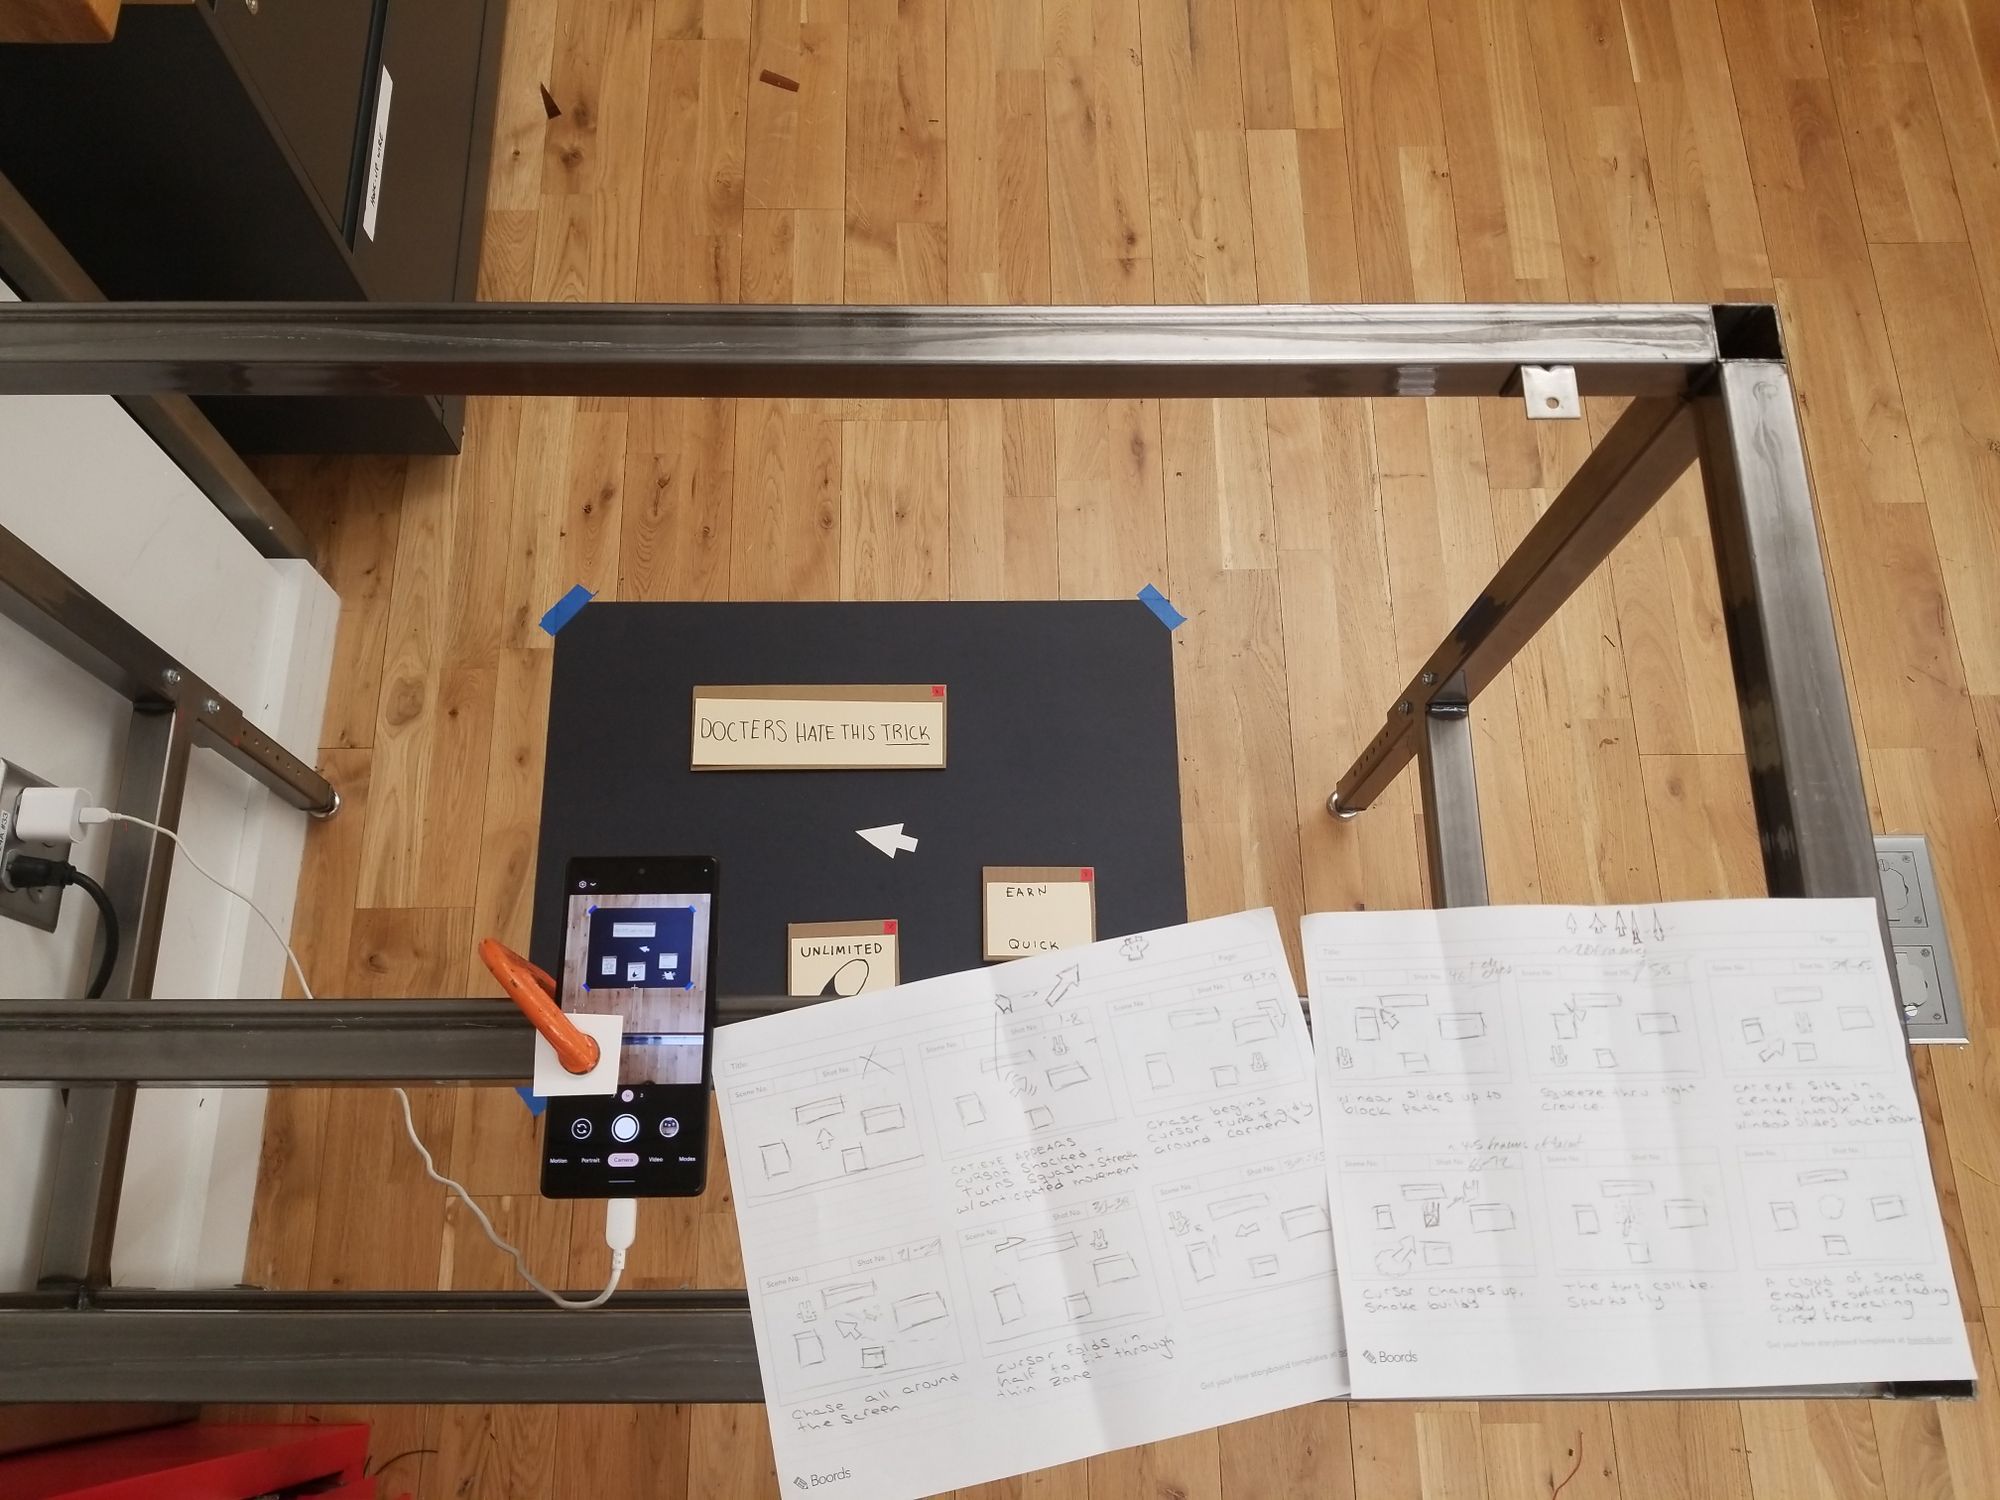
Once we were happy with those, it was time to begin animating. We met at the Shop on Saturday with plans to try tackling both loops in one session. That didn’t pan out–we spent a lot of time trying to figure out how to set up our work area, fiddling with tripods and camera mounting solutions until we finally settled on gently clamping a phone in place above a backdrop for our maze chase.
From there, we also had to create our elements for the animation. I took the lead on creating the cursor variants and the pop-up frames while Sim handled our mischievous cat.exe and the pop-up ad content.
The actual process of then animating the sequence was, well, laborious. I should’ve either stretched before we began or stayed planted on the floor, but instead all my crouching up and down as we adjusted for each frame left me feeling pretty sore for a few days. Sim kept track of our shot list and the beats in the storyboard on top of taking the photos.
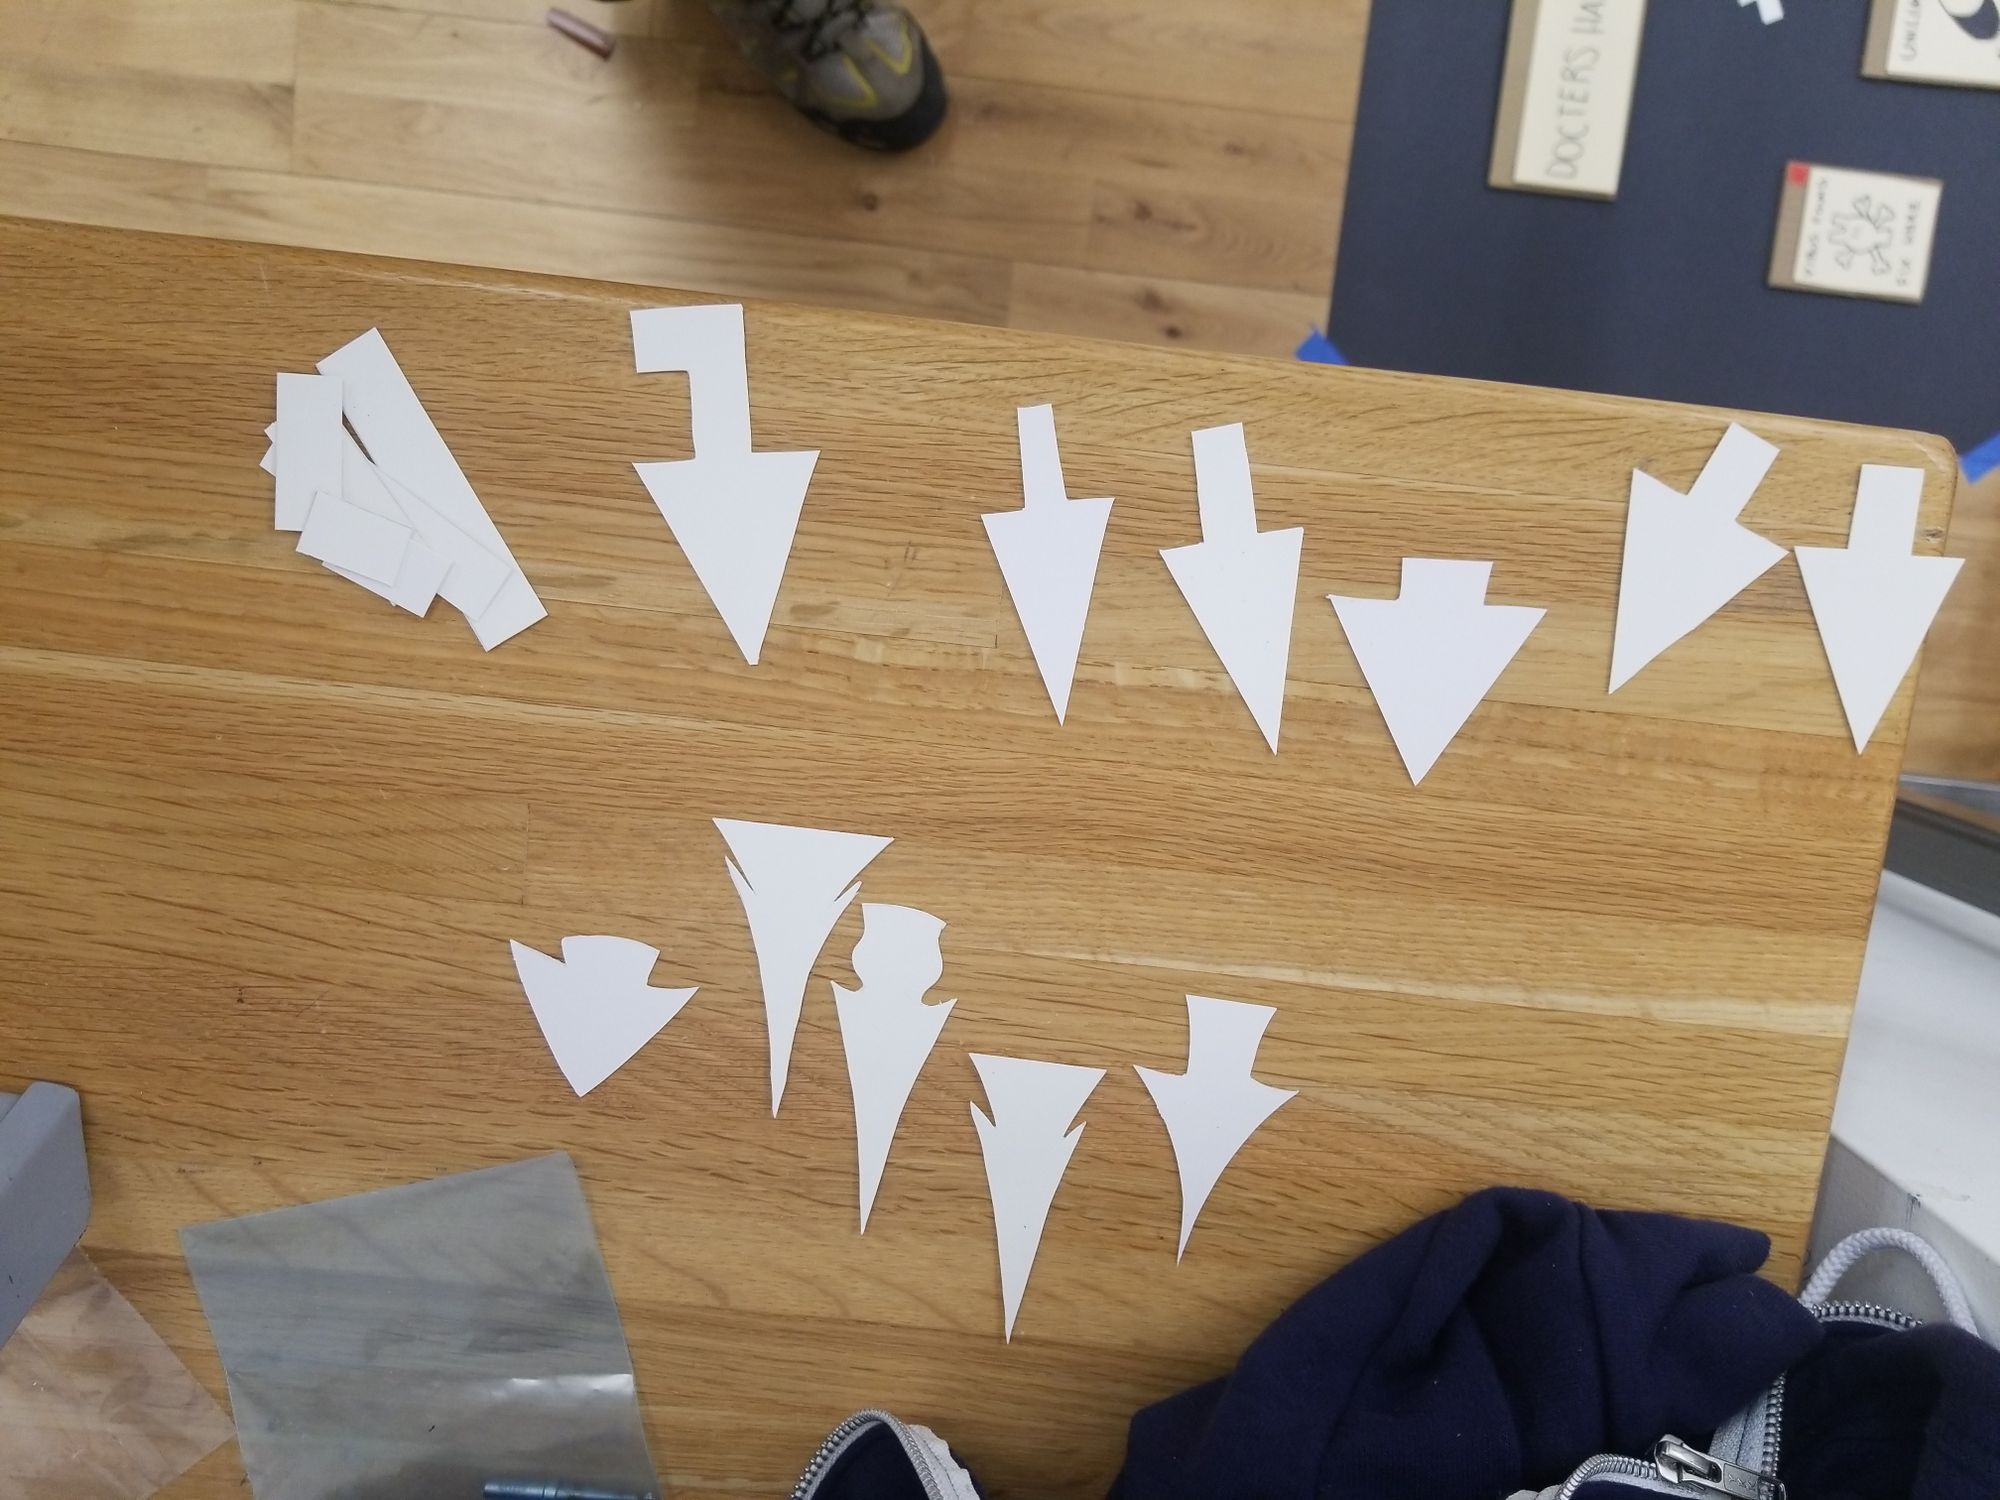
It took us about as long as we had planned to meet for just to shoot the maze chase, so we then decided to tackle the origami loop differently: I would handle making all of the necessary origami and crumpled paper figures, photograph them, then pass those photos over to Sim for compositing and animation. Here’s Sim’s description of that process:
I first used color key in Premiere to remove most backgrounds and rescale/rotate each frame. Did a tiny bit of clean up for messier frames with the eraser tool in Photoshop. Then in Premiere I created and named each frame in sequence using transform tools and the still capture button (making independent sequence folders for the fish and the background). Then I loaded each frame into Adobe Media Encoder to make a video, put that into After Effects to add a hint of motion blur and frame blending then pit together the fish video and background video in Premiere where I used the cut and speed adjustment tools to produce a final video. I [then] converted that video into a gif using Adobe Express in the browser.
We both made attempts at finishing up the maze animation. For my part, I used Photoshop’s seemingly deprecated tools for animating and outputting GIFs. The workflow there is far from ideal: once you have a lot of frames loaded in sequence, or at least frames of this size, Photoshop tends to run into unintelligible errors. To make adjustments for the sake of erasing inconsistencies between frames (in our case, shadows cast on the paper or items that jitter or move when they shouldn’t), it really helps to be able to see the animation in sequence and adjust from there. Photoshop just isn't great for making those tweaks while in GIF mode.
With the maze, note that the part in the loop where the cursor squeezes through the tiny gap between windows was intentionally animated on ones while the rest goes on twos. I think it still goes by a little too quickly to really sell that struggle, but I think it’s best left as-is with the frames we shot. I don’t think running those frames a second time to make the squeeze take longer benefits the pacing of the whole loop, and I think what we probably would need to make it work better would be more variations on the cursor as it pinches and bulges through the gap.
I’m pretty happy with both loop outcomes though, especially considering that Sim and I had our Pcomp midterms to work on this week as well. For fun, I also tried making a version of the maze loop with an old green phosphor CRT look. Anachronistic, sure, but restraining the color palette can always help keep GIF size low.–10/20/22